How to Approve and Reject Patch Streams
Last updated on September 02, 2021.
Document Status: Document Feature Complete as of September 02, 2021; PENDING EXTERNAL REVIEW.
Introduction
This document describes the processes for approving and rejecting RPS patch streams using either PowerShell cmdlet or an RPS server website GUI. RPS patch streams are a collection of one or more patches to be applied to targeted items during a scheduled maintenance window. Click the following links for more information on "How to Create a Patch Stream" and "How to Use Maintenance Windows".
When considering the status of patch streams, there are only four valid scenarios allowed within RPS. All other scenarios are considered invalid and are not supported. The processes described within this document are only applicable to the valid scenarios found in the following list:
Valid scenarios:
- Pending to Rejected
- Pending to Approved
- Rejected to Approved
- Approved to Approved (Reapprove)
Invalid scenarios:
- Rejected to Pending
- Approved to Pending
- Approved to Rejected
Note
Users may see "patch" and "package" used interchangeably in the log outputs during this process.
Approve or Reject Patch Streams Using PowerShell Cmdlets
Log into an RPS Server and launch Windows PowerShell or Windows PowerShell ISE as administrator.
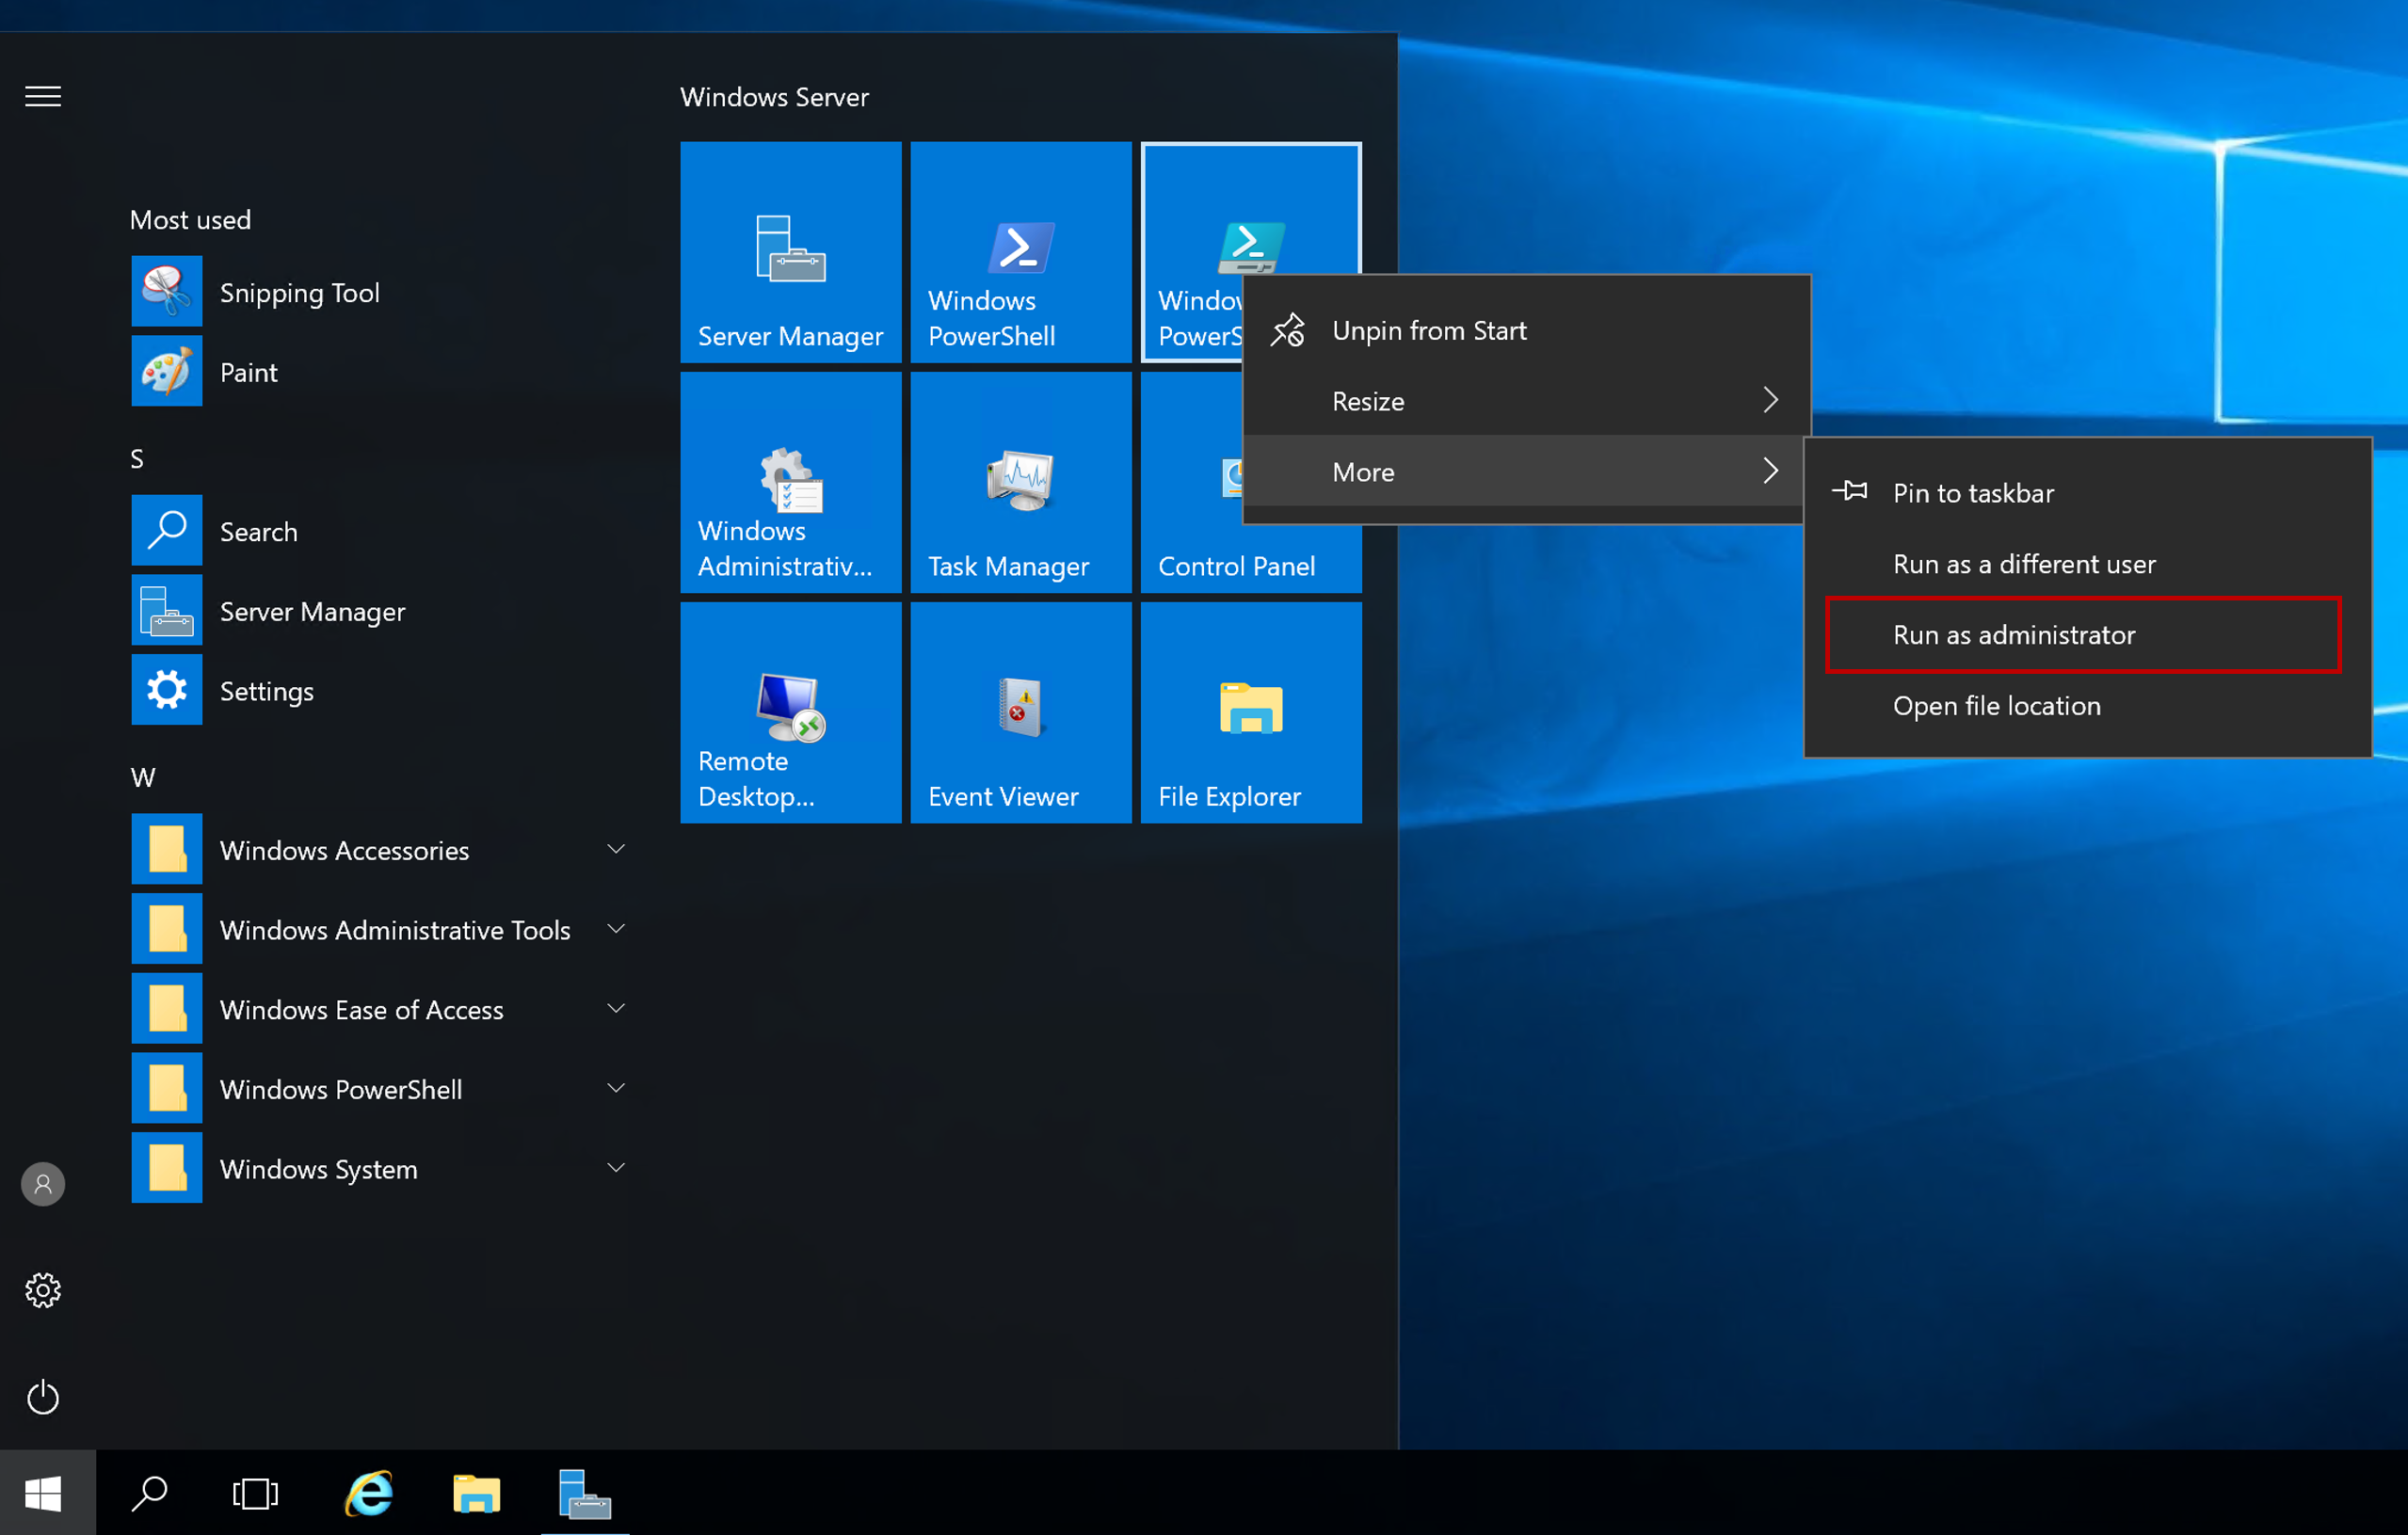
Figure 1: Run PowerShell as administrator.
Change directory to the RPS ContentStore using the following command:
cd C:\ContentStoreImport the RPS API module using the following command:
Import-Module C:\ContentStore\Modules\Rps-ApiApprove the patch stream using the
Approve-RpsPatchStreamcmdlet as seen in the examples below. Table 1 below describes the available parameters associated with approval and rejection. It is necessary to specify one of these parameters to approve or reject a patch stream.Parameter Name Type Description PatchStream PackageStream Patch stream object. Id GUID Guid of the patch stream. Name string Name of the patch stream. Table 1:
Approve-RpsPatchStreamandDeny-RpsPatchStreacmdlet parameters.Examples of
Approve-RpsPatchStreamcmdlet usage:Approve-RpsPatchStream -Name <name>Or, using the same
Nameparameter as the example above but storing the name as a variable:$myPatchStream = Approve-RpsPatchStream -Name <myPatchStream>The following examples show specifying the patch stream by ID or PatchSteam object:
Approve-RpsPatchStream -ID <GUID>Approve-RpsPatchStream -PatchStream <myPatchSteam>It is possible to reapprove a patch stream to correct for assignment changes between targets and patches. For example, targets from one target group move to a different target group after a patch stream has already been approved. Use the
Approve-RpsPatchStreamcmdlet as described above to reapprove the patch stream.To reject a patch stream use the
Deny-RpsPatchStreamcmdlet as seen in the next examples. Use the parameters listed in Table 1 above to complete the command.Deny-RpsPatchStream -Name <name>Deny-RpsPatchStream -ID <GUID>Deny-RpsPatchStream -PatchStream <$stream>
Approve or Reject Patch Streams Using the RPS Website GUI
Note
Patch streams cannot be edited once approved.
Log into the RPS website and navigate to the Distribution menu. Select "Patch Streams" from the available options.

Figure 2: Select "Patch Streams" from the RPS Distribution menu.
Select the "Approvals" tab if not currently selected.
A patch stream in the "Pending Approval" state can be approved by selecting the green Disseminate button on the right-hand side of the "Approvals" tab.
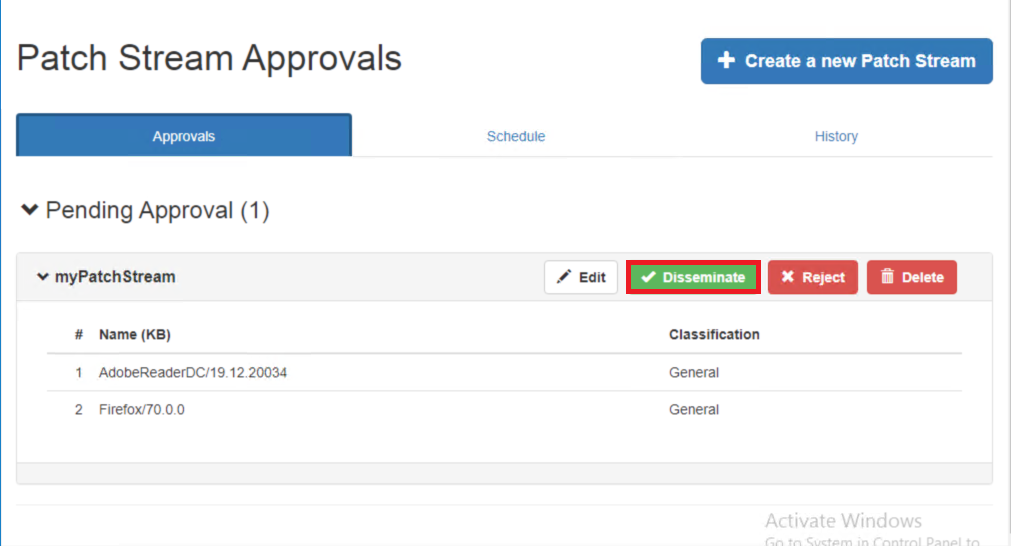
Figure 3: Disseminate the patch stream.
Confirm the approval by clicking Disseminate on the confirmation window as seen below.
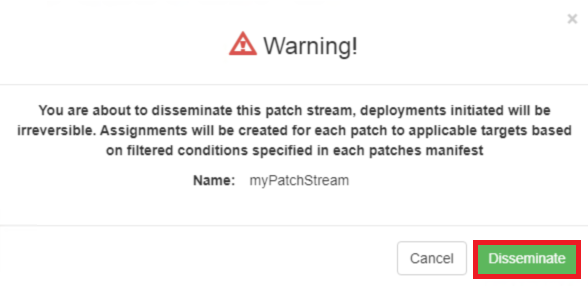
Figure 4: Confirmation Warning Window.
Patch streams in the pending approval state can be rejected by selecting the red Reject button on the right-hand side of the "Approvals" tab.
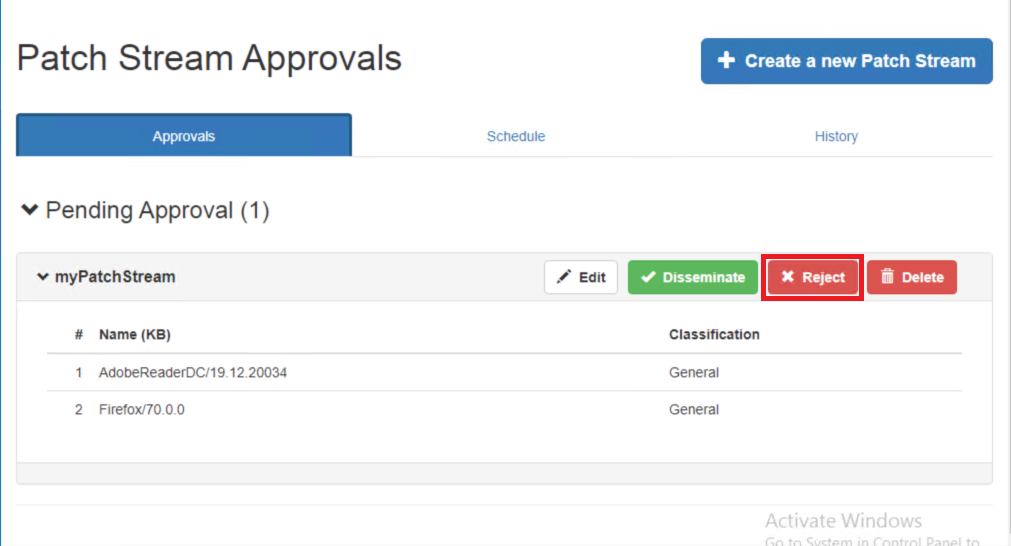
Figure 5: On "Approvals" tab, reject the patch stream.
Confirm the rejection by clicking Reject on the confirmation window as seen below.
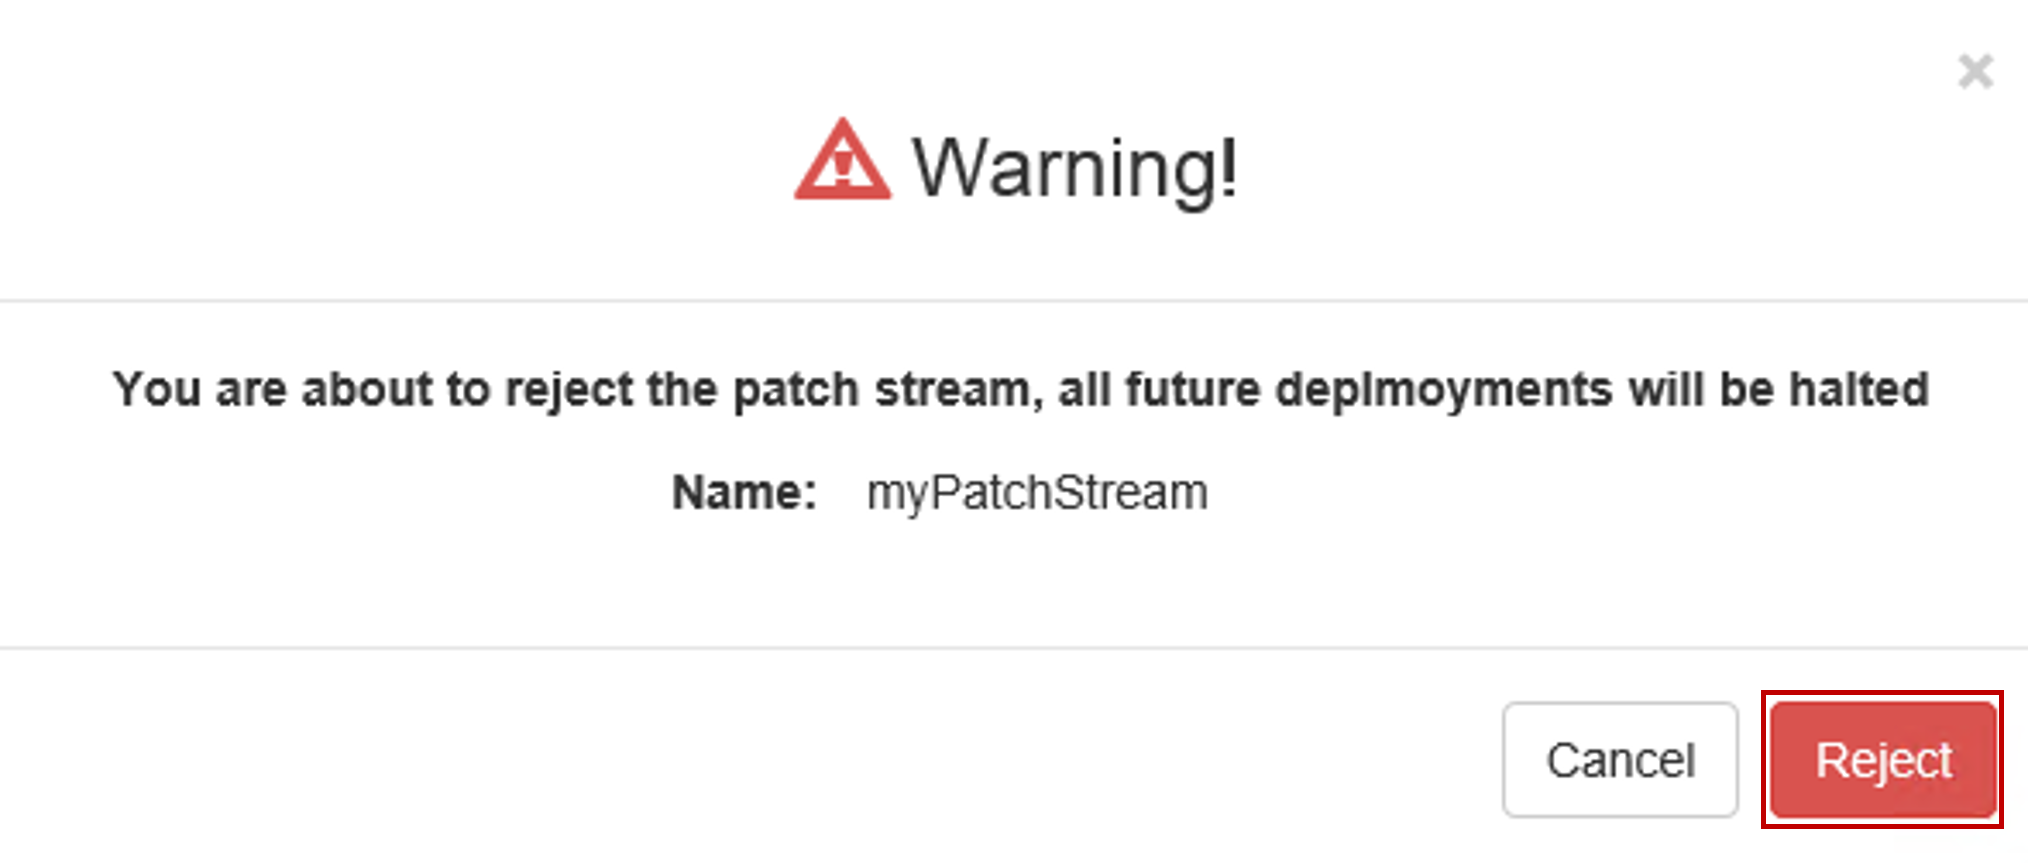
Figure 6: Confirmation Warning Window.
Rejected patch streams will appear at the bottom of the "Approvals" tab under the "Rejected" section. Here individuals with approval permissions can optionally choose to disseminate a previously rejected patch stream by clicking the green Disseminate button as seen in the example below.
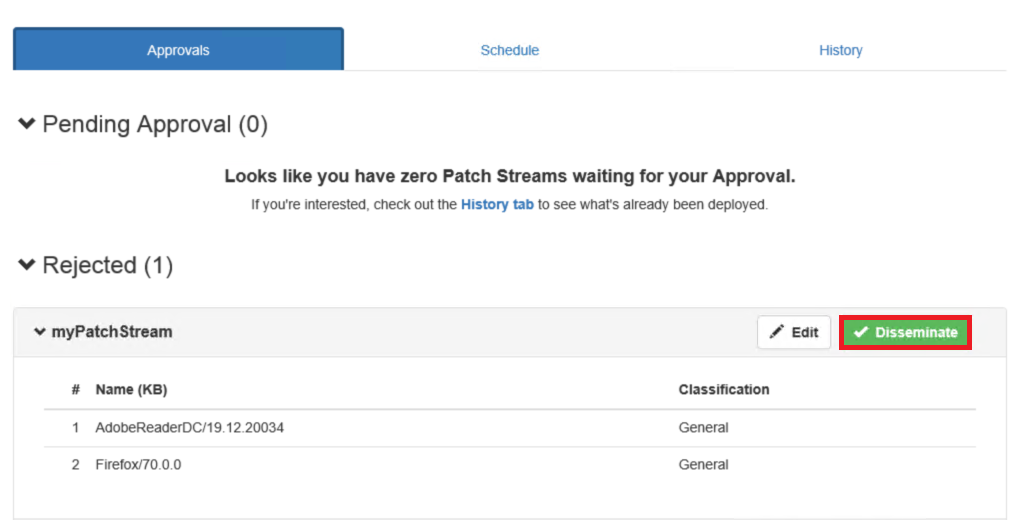
Figure 7: Disseminate previously rejected patch stream.
Confirm the approval by clicking Disseminate on the confirmation window as seen below.
Figure 8: Confirmation Warning Window.
It is possible to disseminate a patch stream to correct for assignment changes between targets and patches. For example, targets from one target group move to a different target group after a patch stream has already been disseminated.
Disseminating patch streams from the RPS website GUI can be accomplished from the "Patch Streams" page "History" tab by selecting the desired patch stream and clicking the green Disseminate button as seen in the example below.
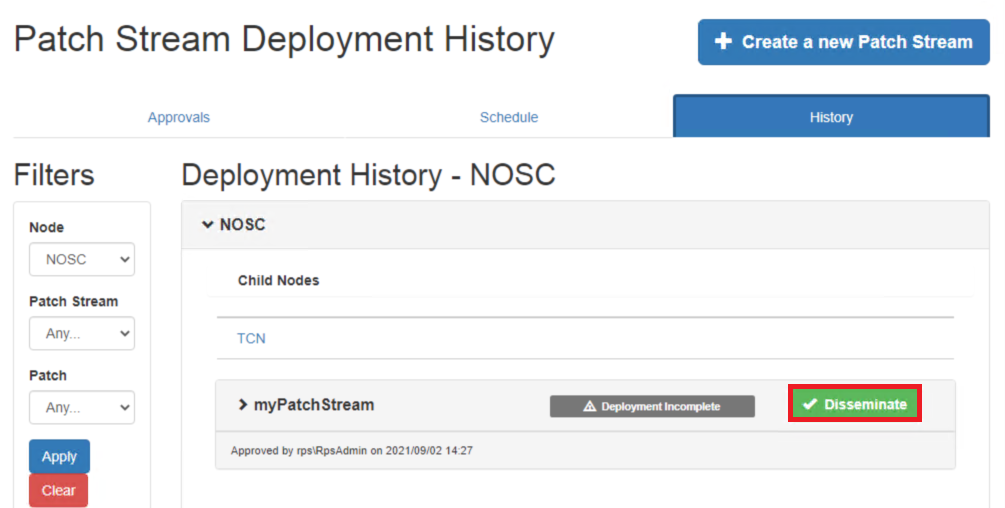
Figure 9: Disseminate patch stream.
Confirm the approval by clicking Disseminate on the confirmation window as seen below.
Figure 10: Confirmation Warning Window.