How to Use Maintenance Windows
Last updated on Julyy 07, 2021.
Last Reviewed and Approved on PENDING REVIEW
Intended Audience
This document is intended for RPS patching roles, Lead Systems Integrators (LSI), Field Service Representatives (FSR), IT staff, and Developers.
What is a Maintenance Window?
Maintenance windows are used in RPS to schedule the exact time needed for system patching or to create a period of no change within the RPS target environment. Maintenance windows are required for scheduling patch streams and are available through the RPS website's Distribution menu. RPS patch streams combine zipped (.zip) RPS patches, an approval process, and a scheduled deployment of patches to RPS targets.
In addition,
Multiple schedules can be created for each patch stream. This allows the deployment of a patch stream to different targets on different schedules.
For administrators, the object is a templatized Resource Item (an object) that gets assigned to one or more Target Items (computers or endpoints) and represents a window of time that a software installation can occur.
Maintenance windows are particularly useful for defining a period of no change or code freeze.
Important
Without an active maintenance window, no patches will be applied or removed
because the Desired State Configuration (DSC) Set command will only run inside a maintenance window.
Creating a Maintenance Window
Maintenance windows can be created through a local RPS node server website, or using PowerShell as described later in this article.
Note
Users may see "patch" and "package" used interchangeably in the log outputs during this process.
Distribution Menu
Navigate to the Distribution Menu. Three menu options are presented: Patch Streams, Patches and Certificate Management. Select Patch Streams.
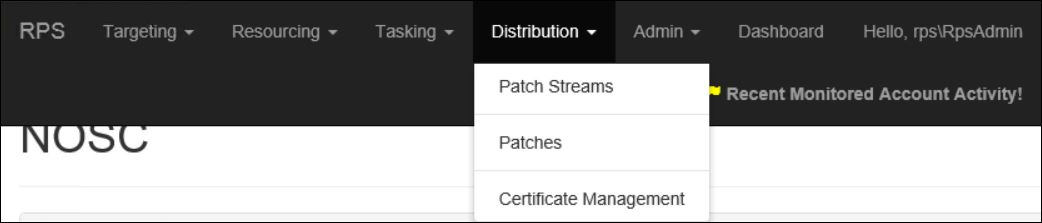
Figure 1: RPS Patching Distribution Menu
Schedule Tab
From the Patch Stream Maintenance Windows page, select the "Schedule" tab.
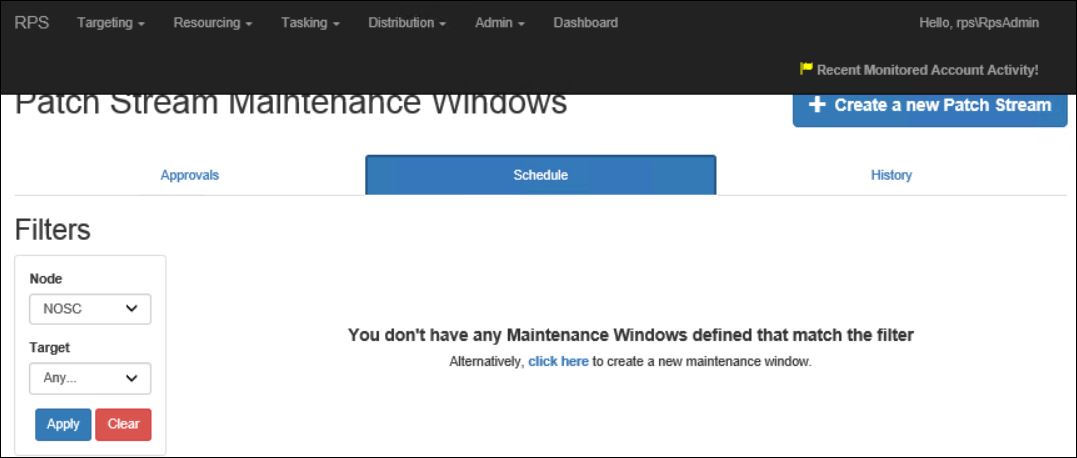
Figure 2: Schedule Tab
Using the Filters on the left side of the window, define the Node and Target you would like to schedule a maintenance window for and click Apply. This search will return any previously scheduled windows for the Node and/or Target you defined. Use the red Clear button to clear the filter.
Create Maintenance Window
If no maintenance windows are defined matching the filter criteria, use the click here link to open the "Create Maintenance Window" form and create a new one.
Tip
Ensure to use a descriptive name for your maintenance window, e.g., Patch Tuesday.
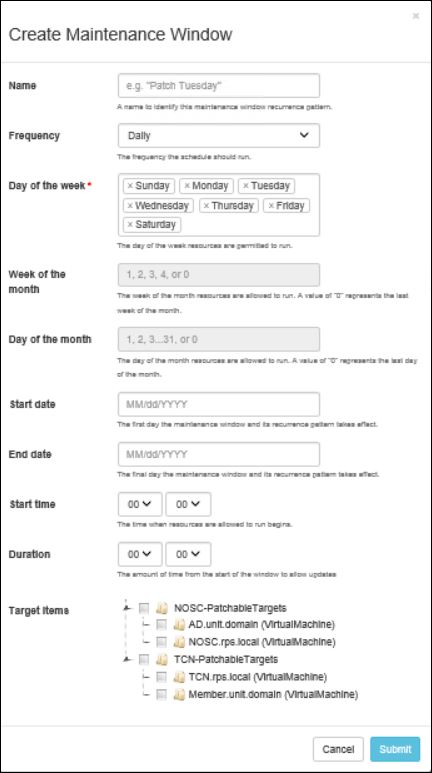
Figure 3: Create Maintenance Window form
The folowing fields are available to define your maintenance window.
Note
It is best practice to create multiple maintenance windows to satisfy your time, date, and frequency requirements.
| Property | Type | Description |
|---|---|---|
| Name | string | The friendly name of the maintenance window. { e.g. 'Patch Tuesday' } |
| Frequency | string | The frequency upon which the window should be open { Daily, Weekly, or Monthly } |
| Day of the Week | string[] | The day(s) of the week Set-TargetResource will run. { Sunday, Monday, Tuesday, Wednesday, Thursday, Friday, or Saturday } |
| Week of the month | int[] | The week(s) of the month Set-TargetResource could be run. 0 represents the last week of the month. { 0, 1, 2, 3, or 4 } |
| Day of the month | int[] | The day(s) of the month Set-TargetResource will run. 0 represents the last day of the month. { 0 - 31 } |
| Start Date | DateTime | The first UTC date Set-TargetResource is allowed to run |
| End Date | DateTime | The last UTC date Set-TargetResource is allowed to run |
| Start Time | TimeSpan | The first time the of day Set-TargetResource is allowed to run |
| Duration | TimeSpan | The amount of time from the start of the window to allow updates. |
| Target Items | Selectable Tree View | Checkbox the target items that apply, or do not select any. |
In addition to identifying the time, date, and frequency of your maintenance window, you will need to identify the target items to which the window applies. This is done by placing checks in the boxes next to items you require assigned to this window. It is possible that you will have maintenance windows with no assigned target items. These assignments can be specified as needed through the UI or via PowerShell cmdlet discussed below.
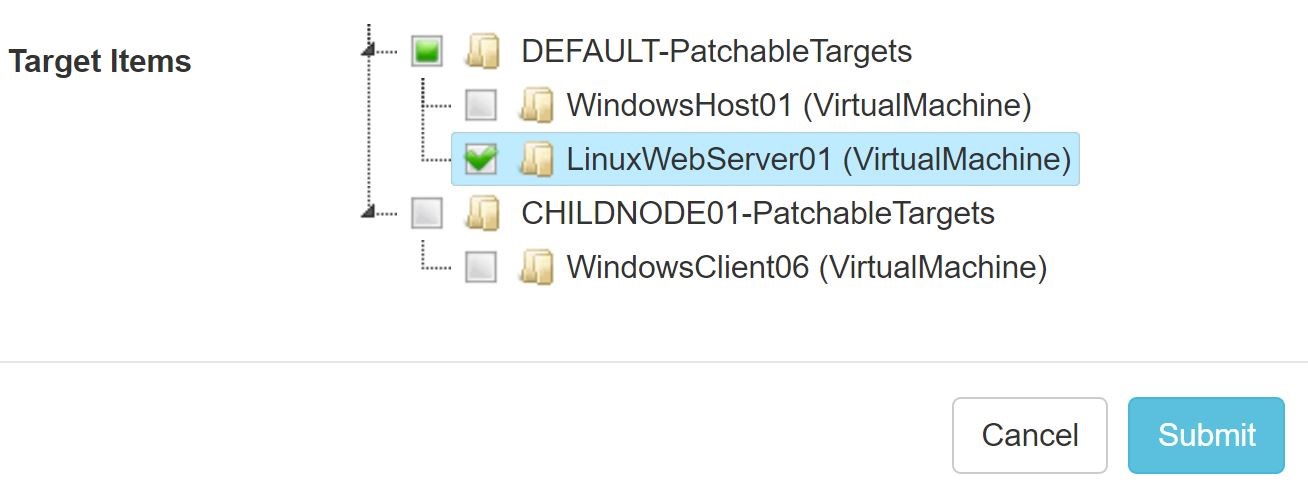
Figure 8: Target Items Tree View
Important
A value of zero 0 in the Day of the month or Week of the month field indicates the last day or week of the month.
Tip
Recommended best practice to utilize Universal Time Coordinated (UTC) dates for Start Date and End Date regardless of target item time zone.
Once you have completed the form, save the maintenance window by clicking the Submit button.
Using PowerShell To Create a Maintenance Window
As seen in the example below, use the New-RpsMaintenanceWindow cmdlet to create your maintenance window using PowerShell.
Note
In the examples below, replace the words in parenthesis with unique names applicable to the maintenance window being created.
$startDate = (Get-Date)
$startTime = New-TimeSpan -Hours 0 -Minutes 0
$endDate = $startDate.AddDays(5)
$endTime = New-TimeSpan -Hours 11 -Minutes 59
$frequency = "Daily"

$myWindow = New-RpsMaintenanceWindow -Name 'myWindow' -Frequency $frequency -StartDate $startDate -StartTime $startTime -EndDate $endDate -EndTime $endTime
Checking the result of $myWindow will show you what was created, for example: $myWindow.Properties:
| Key | Value |
|---|---|
| StartDate | 1/30/2020 12:00:00AM |
| StartTime | 00:00 |
| EndTime | 23:59 |
| EndDate | 2/4/2020 12:00:00AM |
| Frequency | "Daily" |
Use the Get-RPSMaintenanceWindow, Get-RpsTargetItem, and New-RpsResourceAssignment cmdlets to specify the target items for your maintenance window
as seen the the following example.
$myWindow = Get-RpsMaintenanceWindow -Name 'myWindow'
$myTargetItem = Get-RpsTargetItem -Name 'myTargetItem'
New-RpsResourceAssignment -ResourceItem $myWindow.MaintenanceWindowResourceItem.Id -TargetItem $myTargetItem
Editing Maintenance Windows
To view or edit existing maintenance windows return to the "Schedule" tab located on the Patch Stream Maintenance Windows page. Using the Filters on the left side of the window, define the Node and Target you would like to view the scheduled maintenance window for and click Apply. This search will return any previously scheduled windows for the Node and/or Target you defined. Use the red Clear button to clear the filter.
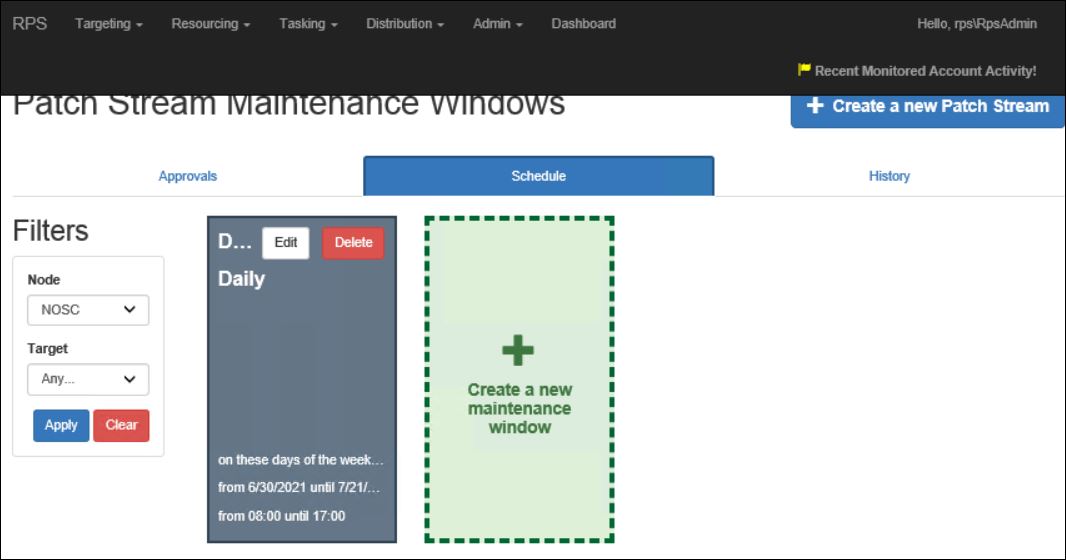
Figure 4: View or Edit Maintenance Windows
To view an existing maintenance window using PowerShell, use the Get-RpsMaintenanceWindow cmdlet. The below examples show runing this cmdlet
against the -Name and the -Id paramaters.
Get-RpsMaintenanceWindow -Name 'myWindow'
or
Get-RpsMaintenanceWindow -Id <GUID>
To make any necessary changes click the Edit button on the top-right of the maintenance window tile, shown below:
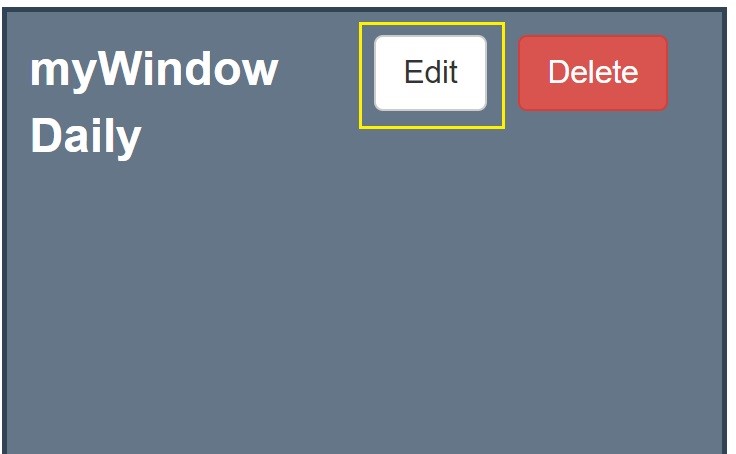
Figure 5: Edit Button
The "Create Maintenance Window" form will open allowing you to make changes. Once completed click Submit.
To edit with PowerShell you will use the Get-RpsMaintenanceWindow followed by the Set-RPSMaintenanceWindow cmdlets as seen
in the following examples.
$myWindow = Get-RpsMaintenanceWindow -Name 'myWindow'
Set-RpsMaintenanceWindow -Id $myWindow.Id -DayOfTheWeek 'Sunday'
or
$myWindow = Get-RpsMaintenanceWindow -Name 'myWindow'
Set-RpsMaintenanceWindow -Name 'myWindow' -DayOfTheWeek 'Sunday'
In both of these examples the -DayofTheWeek property was set to Sunday by calling the -Name or -Id of the 'myWindow' maintenance window.
Deleting Maintenance Windows
To delete existing maintenance windows return to the "Schedule" tab located on the Patch Stream Maintenance Windows page. Using the Filters on the left side of the window, define the Node and Target you would like to view the scheduled maintenance window for and click Apply. This search will return any previously scheduled windows for the Node and/or Target you defined.
Select the applicable window you would like to delete and click the red Delete button on the top-right of the maintenance window tile, shown below:
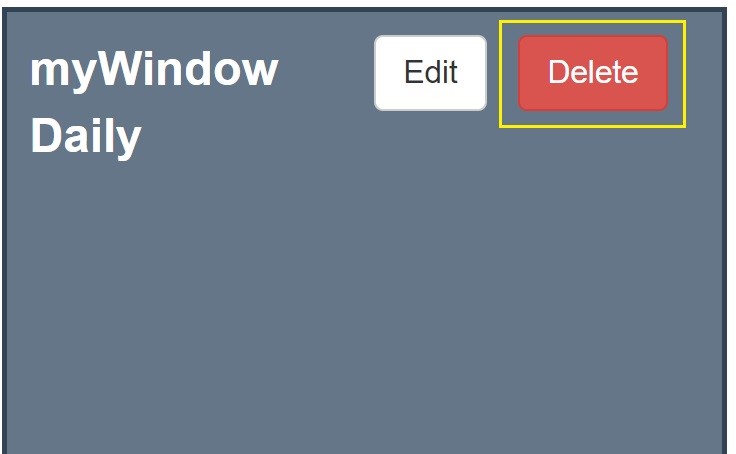
Figure 6: Delete Button
A warning dialog opens displaying information about the mainenance window to be deleted. Clck the red Delete button to continue or click Cancel to close without deleting.

Figure 7: Deletion Warning Dialog Box
Use the Delete-RpsMaintenanceWindow cmdlet to delete a maintenance window using PowerShell, as seen in the example below:
Delete-RpsMaintenanceWindow -Id <GUID>