Sidewinder
Last updated on August 25, 2021.
Document Status: Document Developer Quality Complete.
Important
Documentation bundled with Sidewinder is accurate as of 9/20/2021.
Updated documentation can be found at: https://reactr.azurewebsites.us
Introduction
Sidewinder is an application that enables sideloading of approved patch streams from one RPS instance to another.
Prerequisites
General
- Permissions to execute an application.
- Non-administrative permissions to the current user's My Documents.
- SMB ports and protocols to RPS instance (source and target).
- HTTP ports and protocols to RPS instance (source and target, if target is 4.0).
Export
- Access to RPS 4.0 CDN with either logged in user or alternate account with username and password.
- Access to RPS 4.0 API (ports and protocols only; no RPS RBAC needed).
- Access to file system to create archive (.zip file).
Import
- Access to RPS 4.0 or 3.1 CDN with either logged in user or alternate account with username and password.
- Access to RPS 4.0 API (when importing to RPS 4.0).
- Source patch stream archive created previously by Sidewinder from another instance of RPS.
Settings
A valid configuration must be specified in settings for all of the tabs in Sidewinder to be accessible. The Save button must be selected for updated configurations to take effect. Settings will be persisted to disk for that particular user.
RPS Version
This setting only impacts importing, as Sidewinder only supports exporting from RPS 4.0.
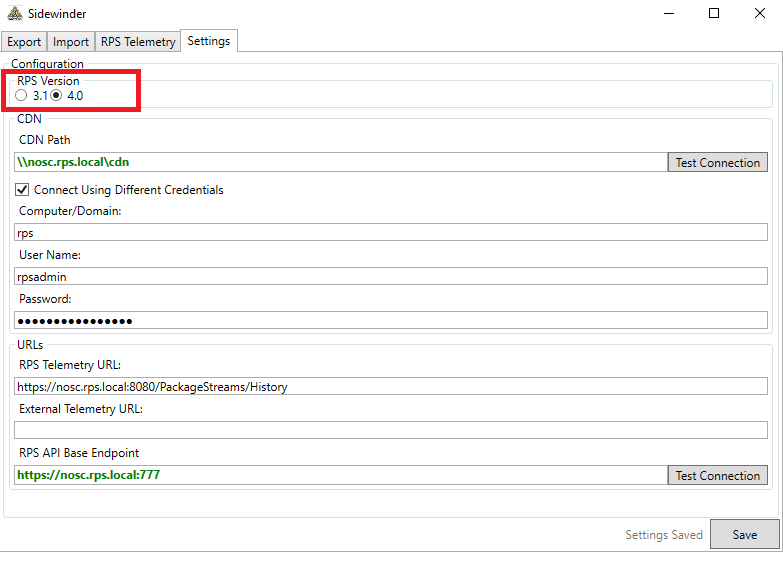
Figure 1: Settings - RPS Version Selection
CDN / Credentials
| Setting | Details |
|---|---|
| CDN Path | UNC path to the CDN folder. This can be network or local path. Click the Test Connection button to test the CDN location in combination with the credentials specified (if any). Defaults to C:\CDN. |
| Connect Using Different Credentials | If checked, the user must specify a domain, user name, and password to connect to the CDN. By default, this setting is not selected (unchecked). |
| Computer/Domain | Computer, domain, or workgroup to provide when "Connect Using Different Credentials" is selected (checked). Defaults to the current computer or domain (if domain joined). |
| User Name | The user name to provide when "Connect Using Different Credentials" is selected (checked). Defaults to current logged in user. |
| Password | The user name's password to provide when "Connect Using Different Credentials" is selected (checked). This data is encrypted in memory and is destroyed when the application closes. For security reasons, the password will need to be entered each time the application is opened. |

Figure 2: Settings - CDN/Credential Section
URLs
| Setting | Details |
|---|---|
| RPS Telemetry URL | Specifies the URL to use for the RPS Telemetry page under the RPS Telemetry tab. |
| External Telemetry URL | Specifies the URL to use for the External Telemetry page under the RPS Telemetry tab. |
| RPS API Base Endpoint | This is the base endpoint for the RPS API of the RPS instance to connect to. The base URLs are used during export (version 4.0 only) and import to either: a. Generate patch stream files on export, orb. Ingest the new patch stream after import has been completed. |
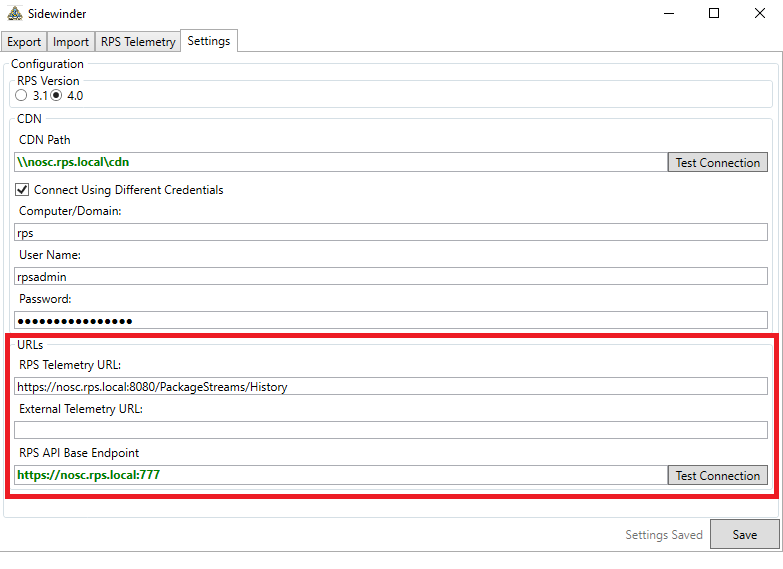
Figure 3: Settings - URLs Section
Saving
It is important to save the settings configuration once editing is complete. A confirmation message will appear when the settings have been successfully saved.
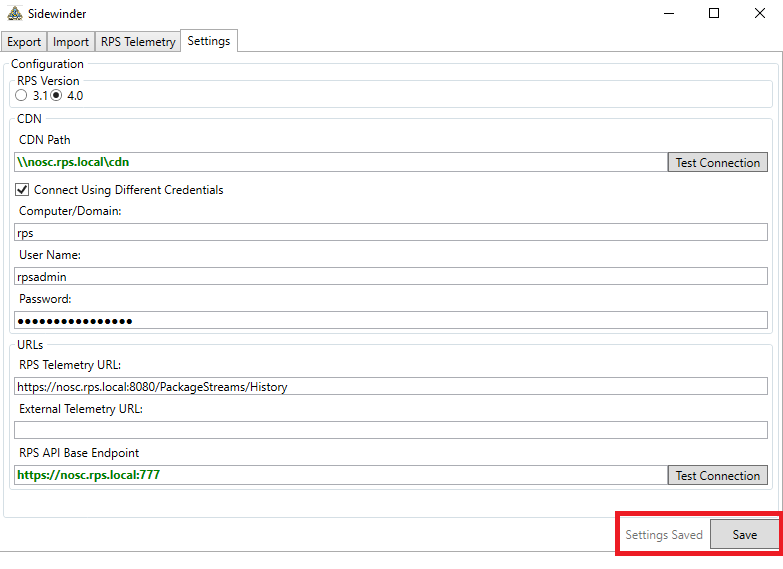
Figure 4: Settings - Save Message
How to Export an RPS v4.0 Patch Stream
Follow these steps to export a patch stream from an RPS 4.0 instance.
On the Export tab, click Find Streams. This will load the patch streams available for export.
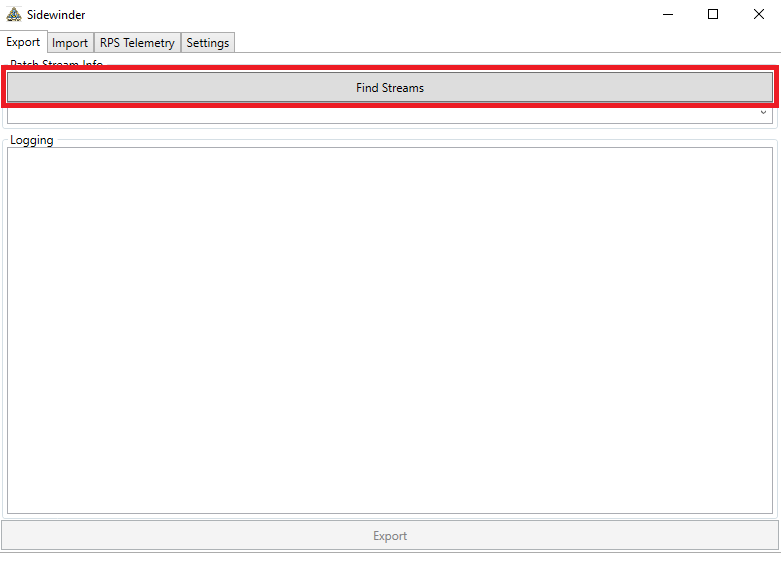
Figure 5: Export - Find Streams
Select the stream to export from the dropdown.
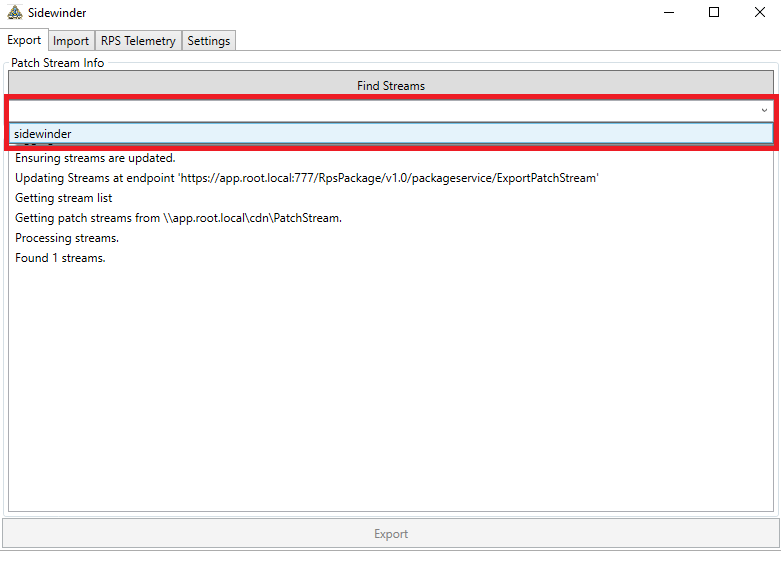
Figure 6: Export - Select Stream
Click Export.
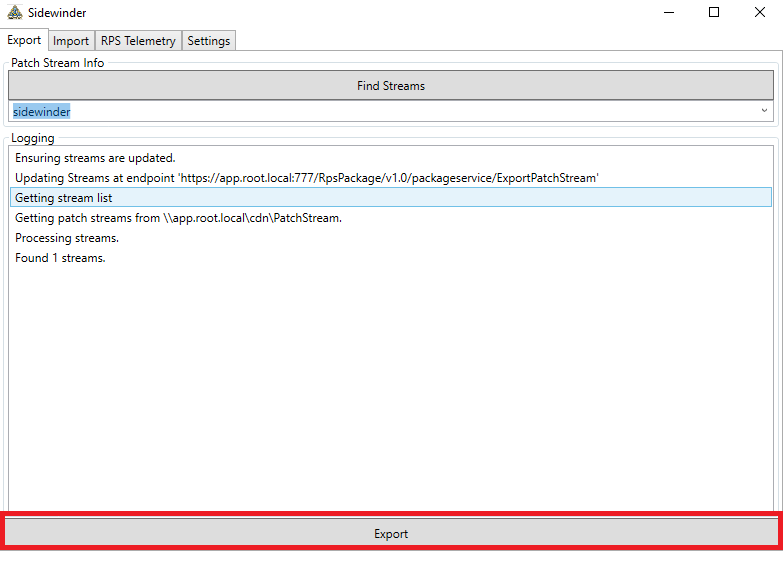
Figure 7: Export - Click Export
Choose the file location to save to and click Save.
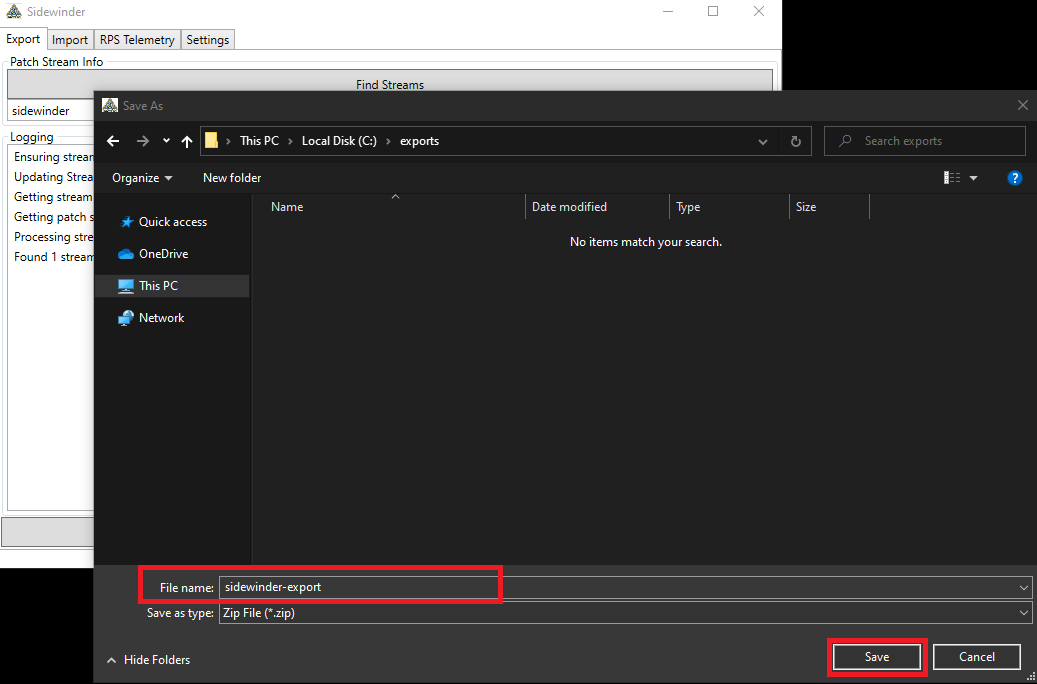
Figure 8: Export - Export File Picker
Check the Logging section for processing status and any error messages.
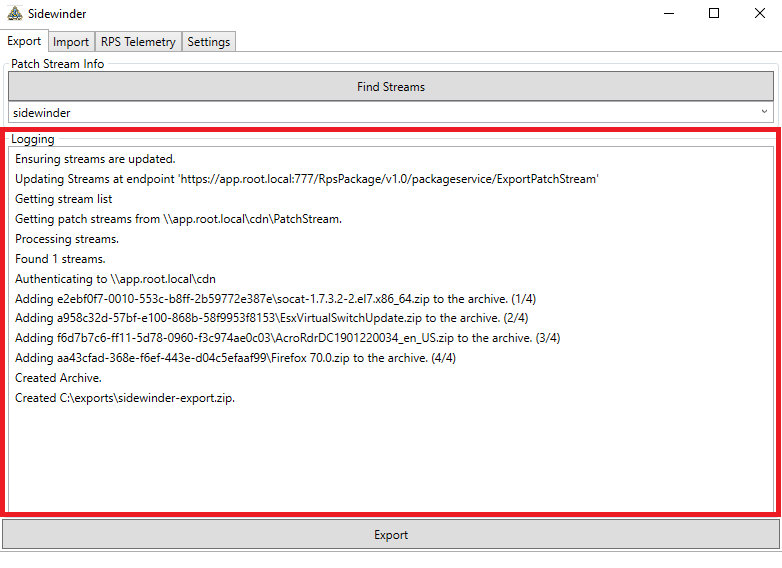
Figure 9: Export - Monitor Export Logs
How to Import a Patch Stream
Follow these steps to import to an RPS Instance.
Note
The steps for importing to RPS 4.0 and RPS 3.1 are the same. Be sure to pick the correct version of RPS from the Settings tab.
On the Import tab, click Browse... and navigate to the archive file.
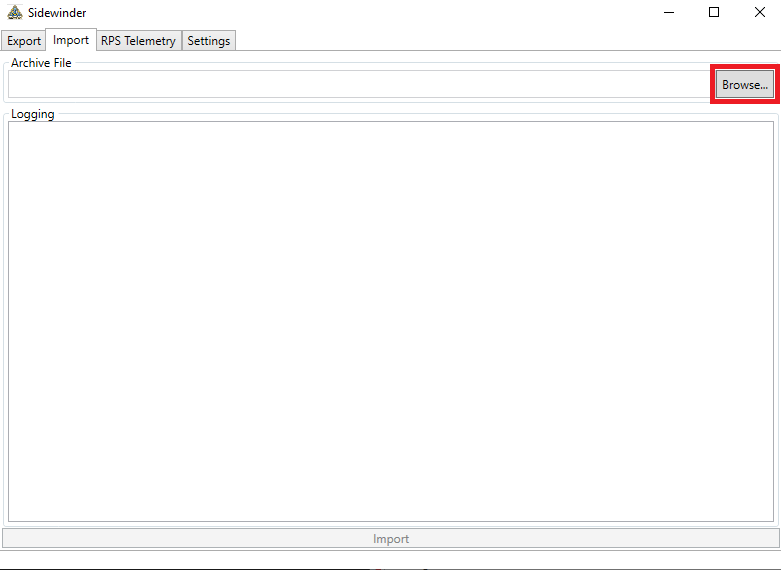
Figure 10: Import - Browse for Archive File
Select the exported patch stream zip file, and then click Open.

Figure 11: Import - Select Patch Stream Zip File
Click Import.
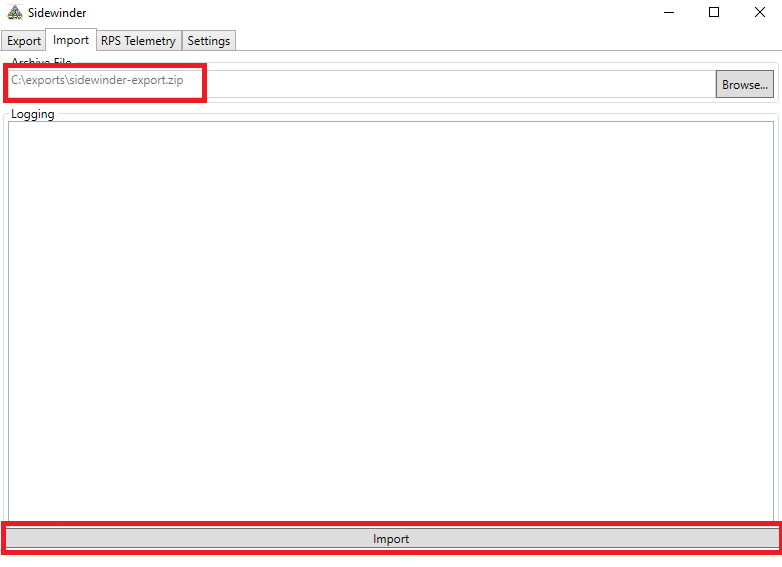
Figure 12: Import - Click Import
Important
When importing to RPS 3.1, you may see a PowerShell window open. Do not close this window during processing.
Check the Logging section for processing status and any error messages.
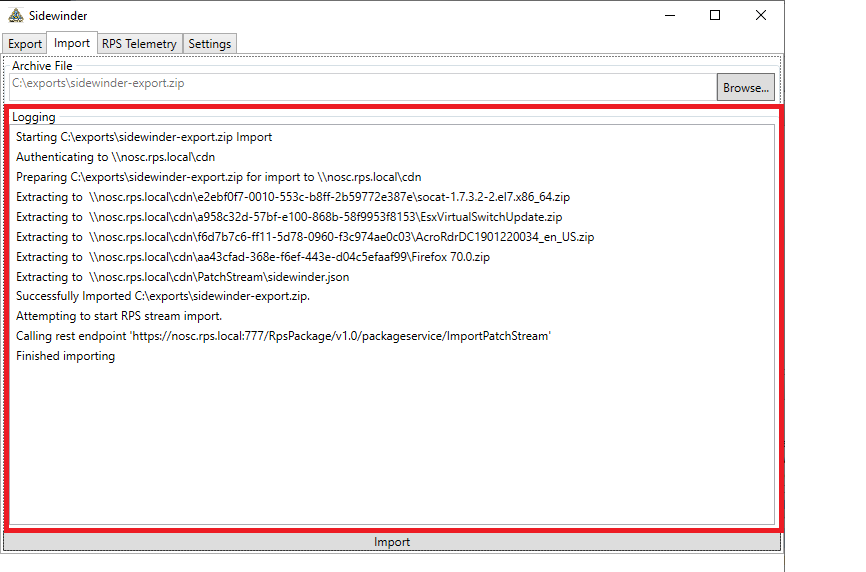
Figure 13: Import - Monitor Import Logs