How to Create a Patch Stream
Last updated on July 9, 2021.
Last Reviewed and Approved on PENDING REVIEW
Introduction
This document provides step-by-step instructions for loading a patch stream into RPS using the User Interface.
Prerequisites
- User must have permissions to the CDN folder.
- User must be part of the ContentCreators Active Directory group.
- Patches must have been previously created. Please visit How to Create an RPS Patch for detailed instructions.
Note
Users may see "patch" and "package" used interchangeably in the log outputs during this process.
What is a Patch Stream
A patch stream is what RPS calls a collection of RPS patches that will be distributed via RPS to other RPS targets with the intent of managing the software on the target.
A patch is a .ZIP archive that contains the content to deploy to the desired Targets and an RPS Patch Manifest file. The .ZIP archive in its entirety is what would be considered an "RPS Patch", not the individual files inside.
Tip
You can find out more about RPS patches in the article "How to Create an RPS Patch". You can find out more about RPS patch manifests in the article "RPS Patch Manifest Definition".
How to Create a Patch Stream Using the RPS GUI
Launch the RPS GUI and navigate to any of the patch stream management pages.
From the patch streams page select the Create a new Patch Stream button.
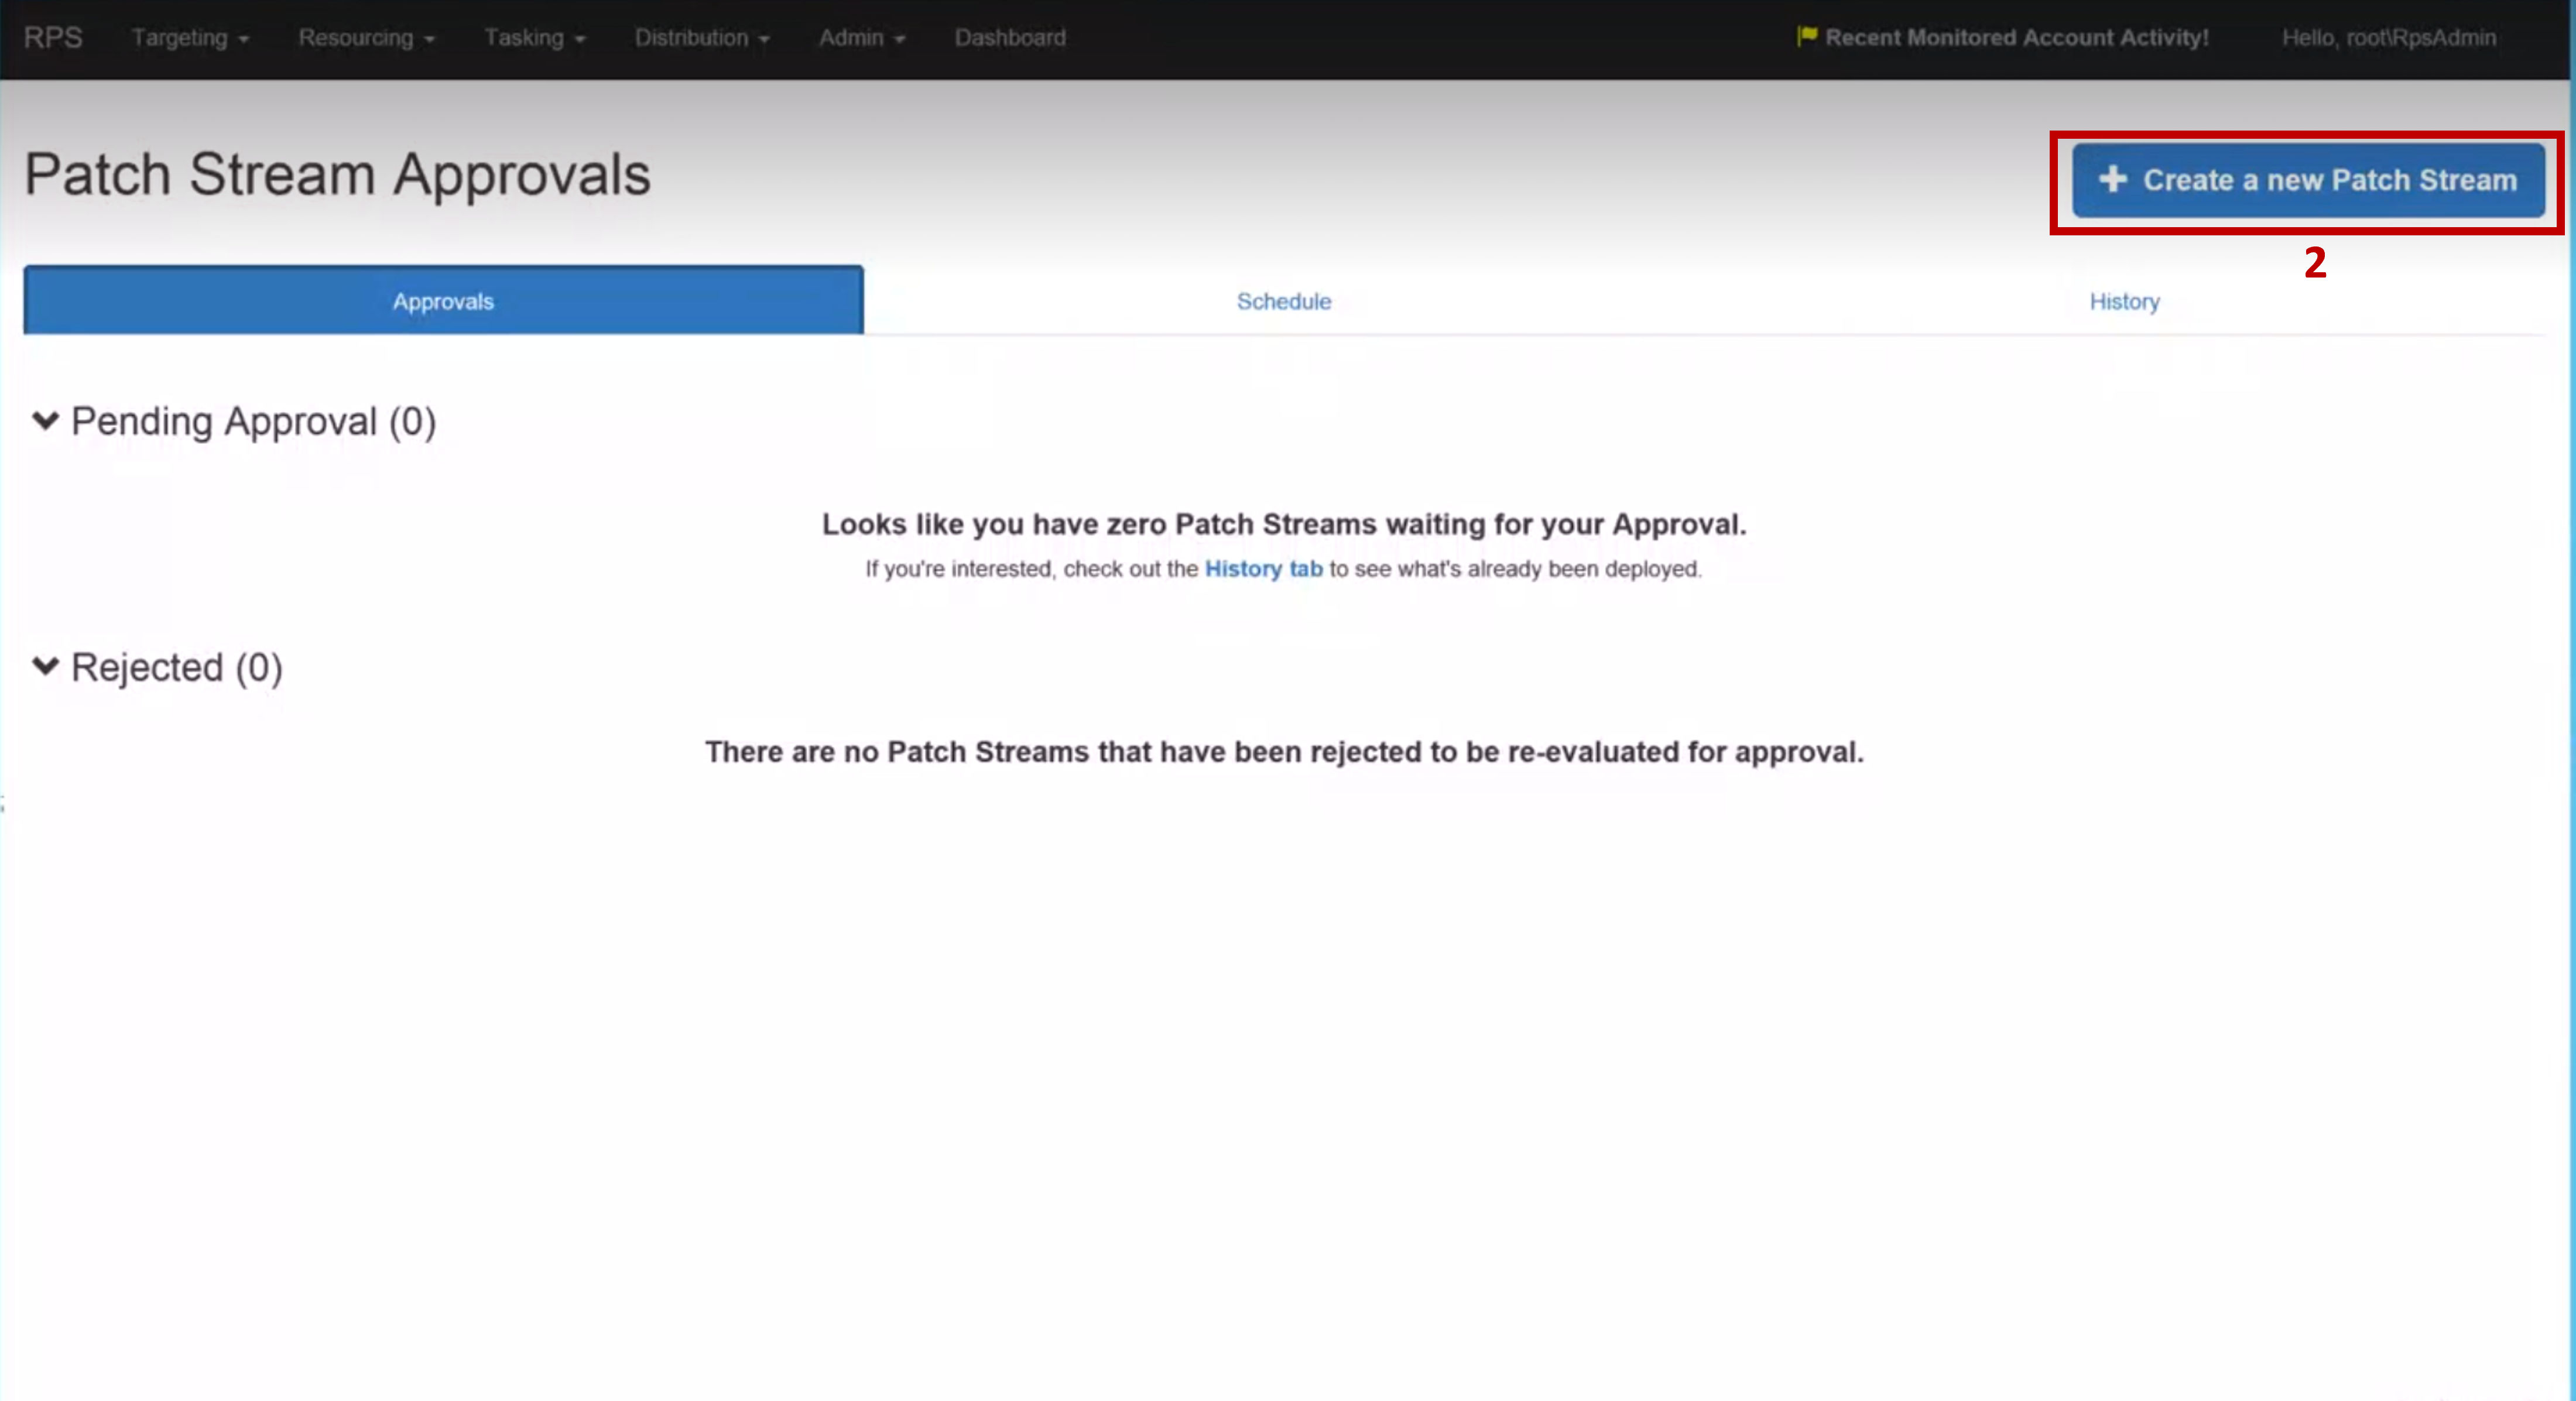
Figure 1: Create a new patch stream button.
A new form will appear and you will be prompted to provide a Unique Name for your new patch stream.
Click Submit.
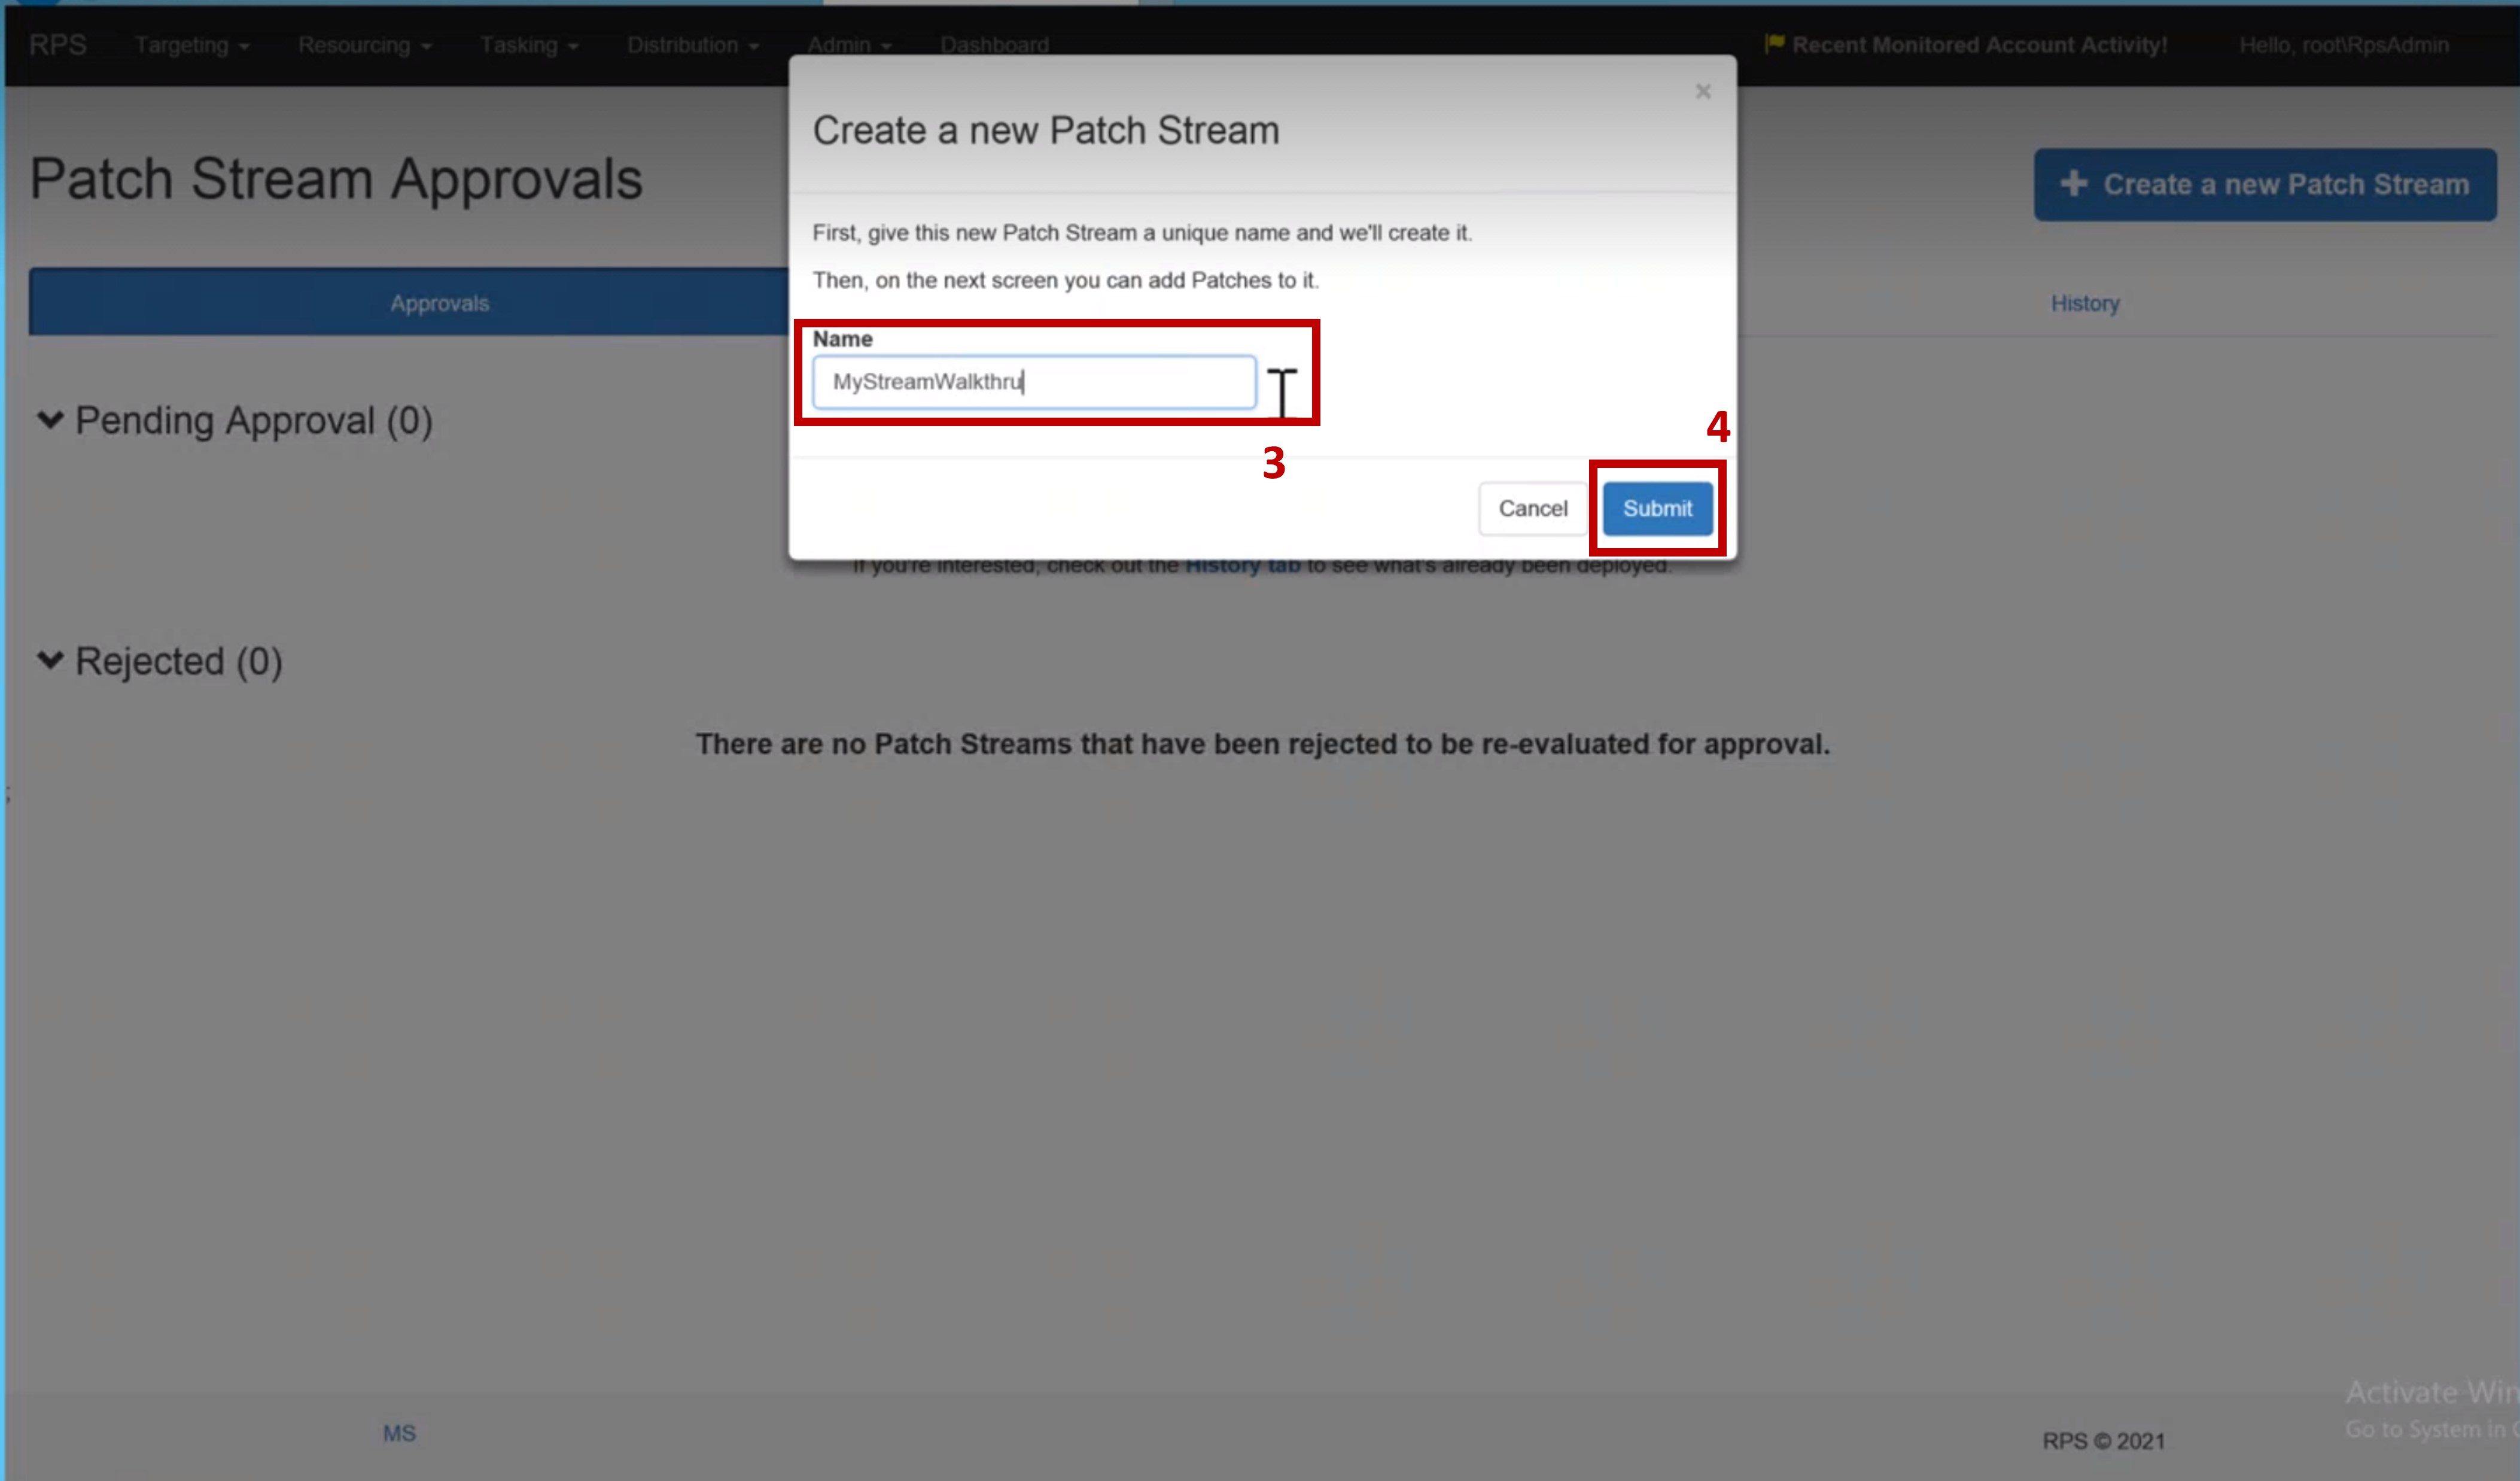
Figure 2: Create a new patch stream Name input.
Upon submit, you will be taken to a patch stream Editing page. Select the button labeled Upload RPS .ZIP Patches to this Stream.
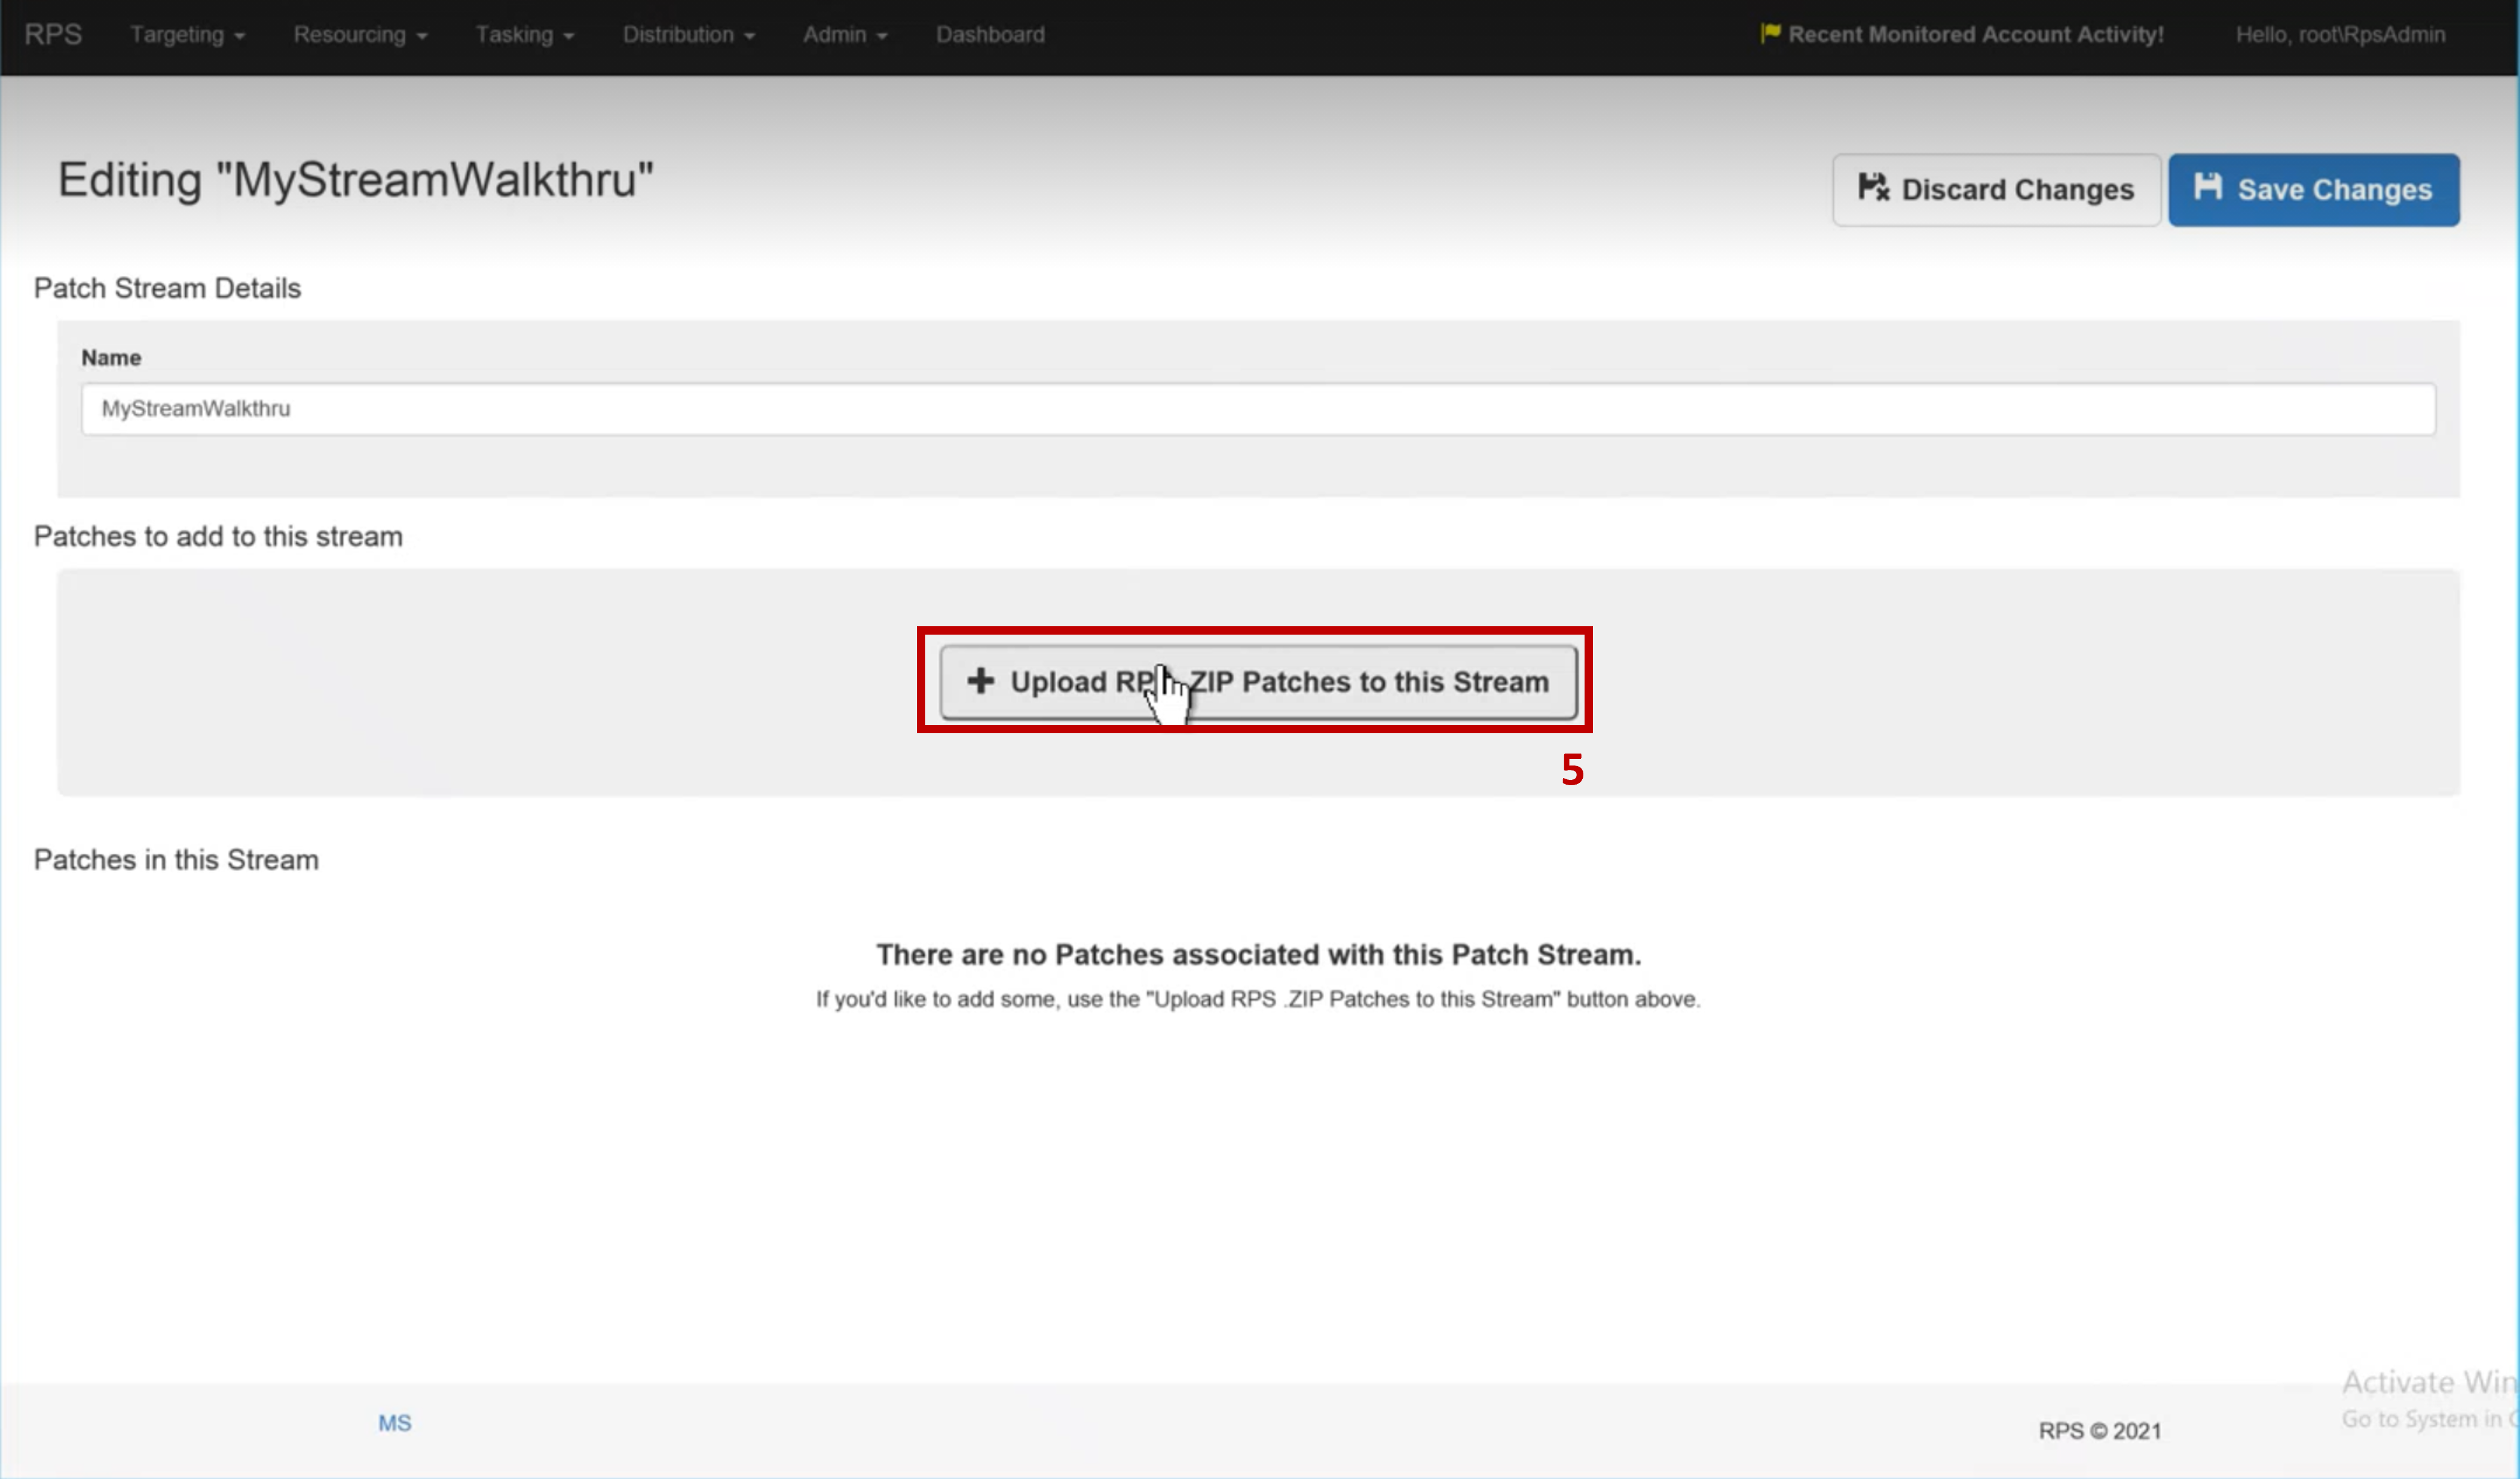
Figure 3: patch stream Edit form.
A new upload form will appear. Use the input button to select the RPS .ZIP patches you wish to associate with the new patch stream.
Select the Upload button.
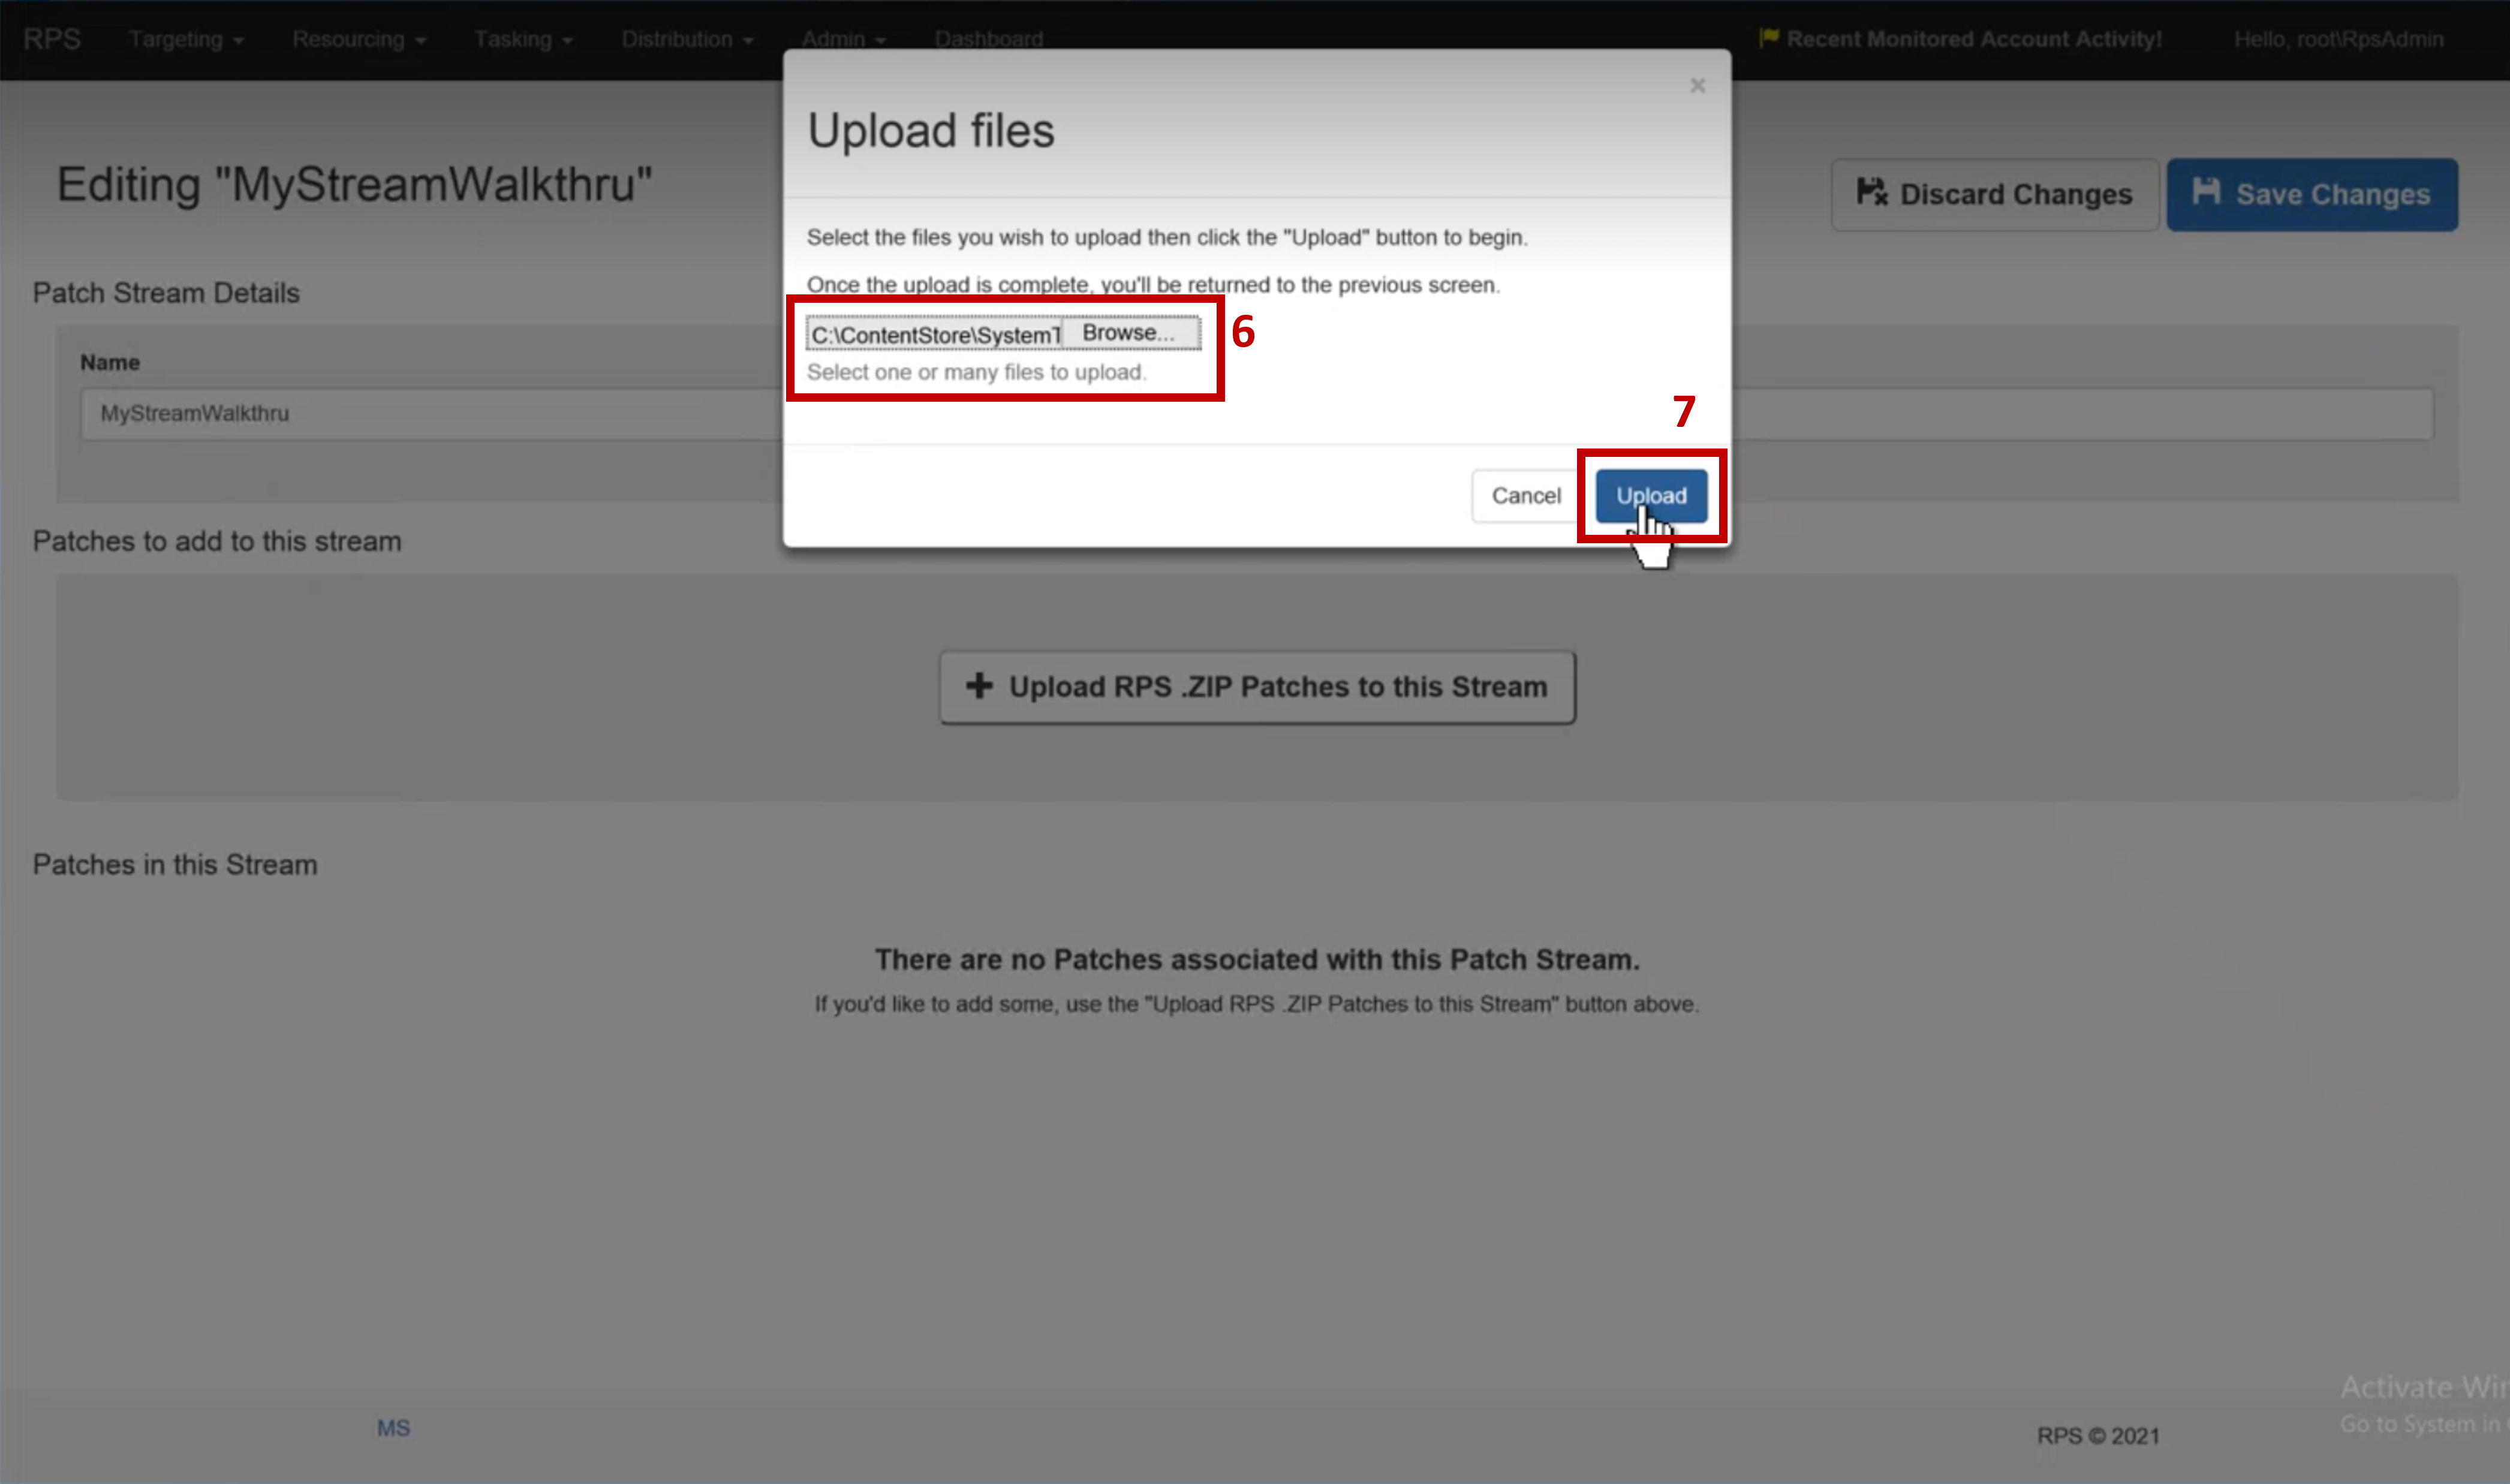
Figure 4: Upload patch files form.
Note
- The patch upload location is configurable and can be modified by adjusting the
uploads:Locationproperty in RPS Web's web.config file. - The patch upload location "days until clean up" is configurable and can be modified by adjusting the
uploads:DaysUntilCleanupproperty in RPS Web's web.config.- The default value for
uploads:Locationis:~/App_Data/Uploads. - The default value for
uploads:DaysUntilCleanupis:30.
- The default value for
- The patch upload location is configurable and can be modified by adjusting the
Your RPS Patches will begin to upload. Click OK once complete.
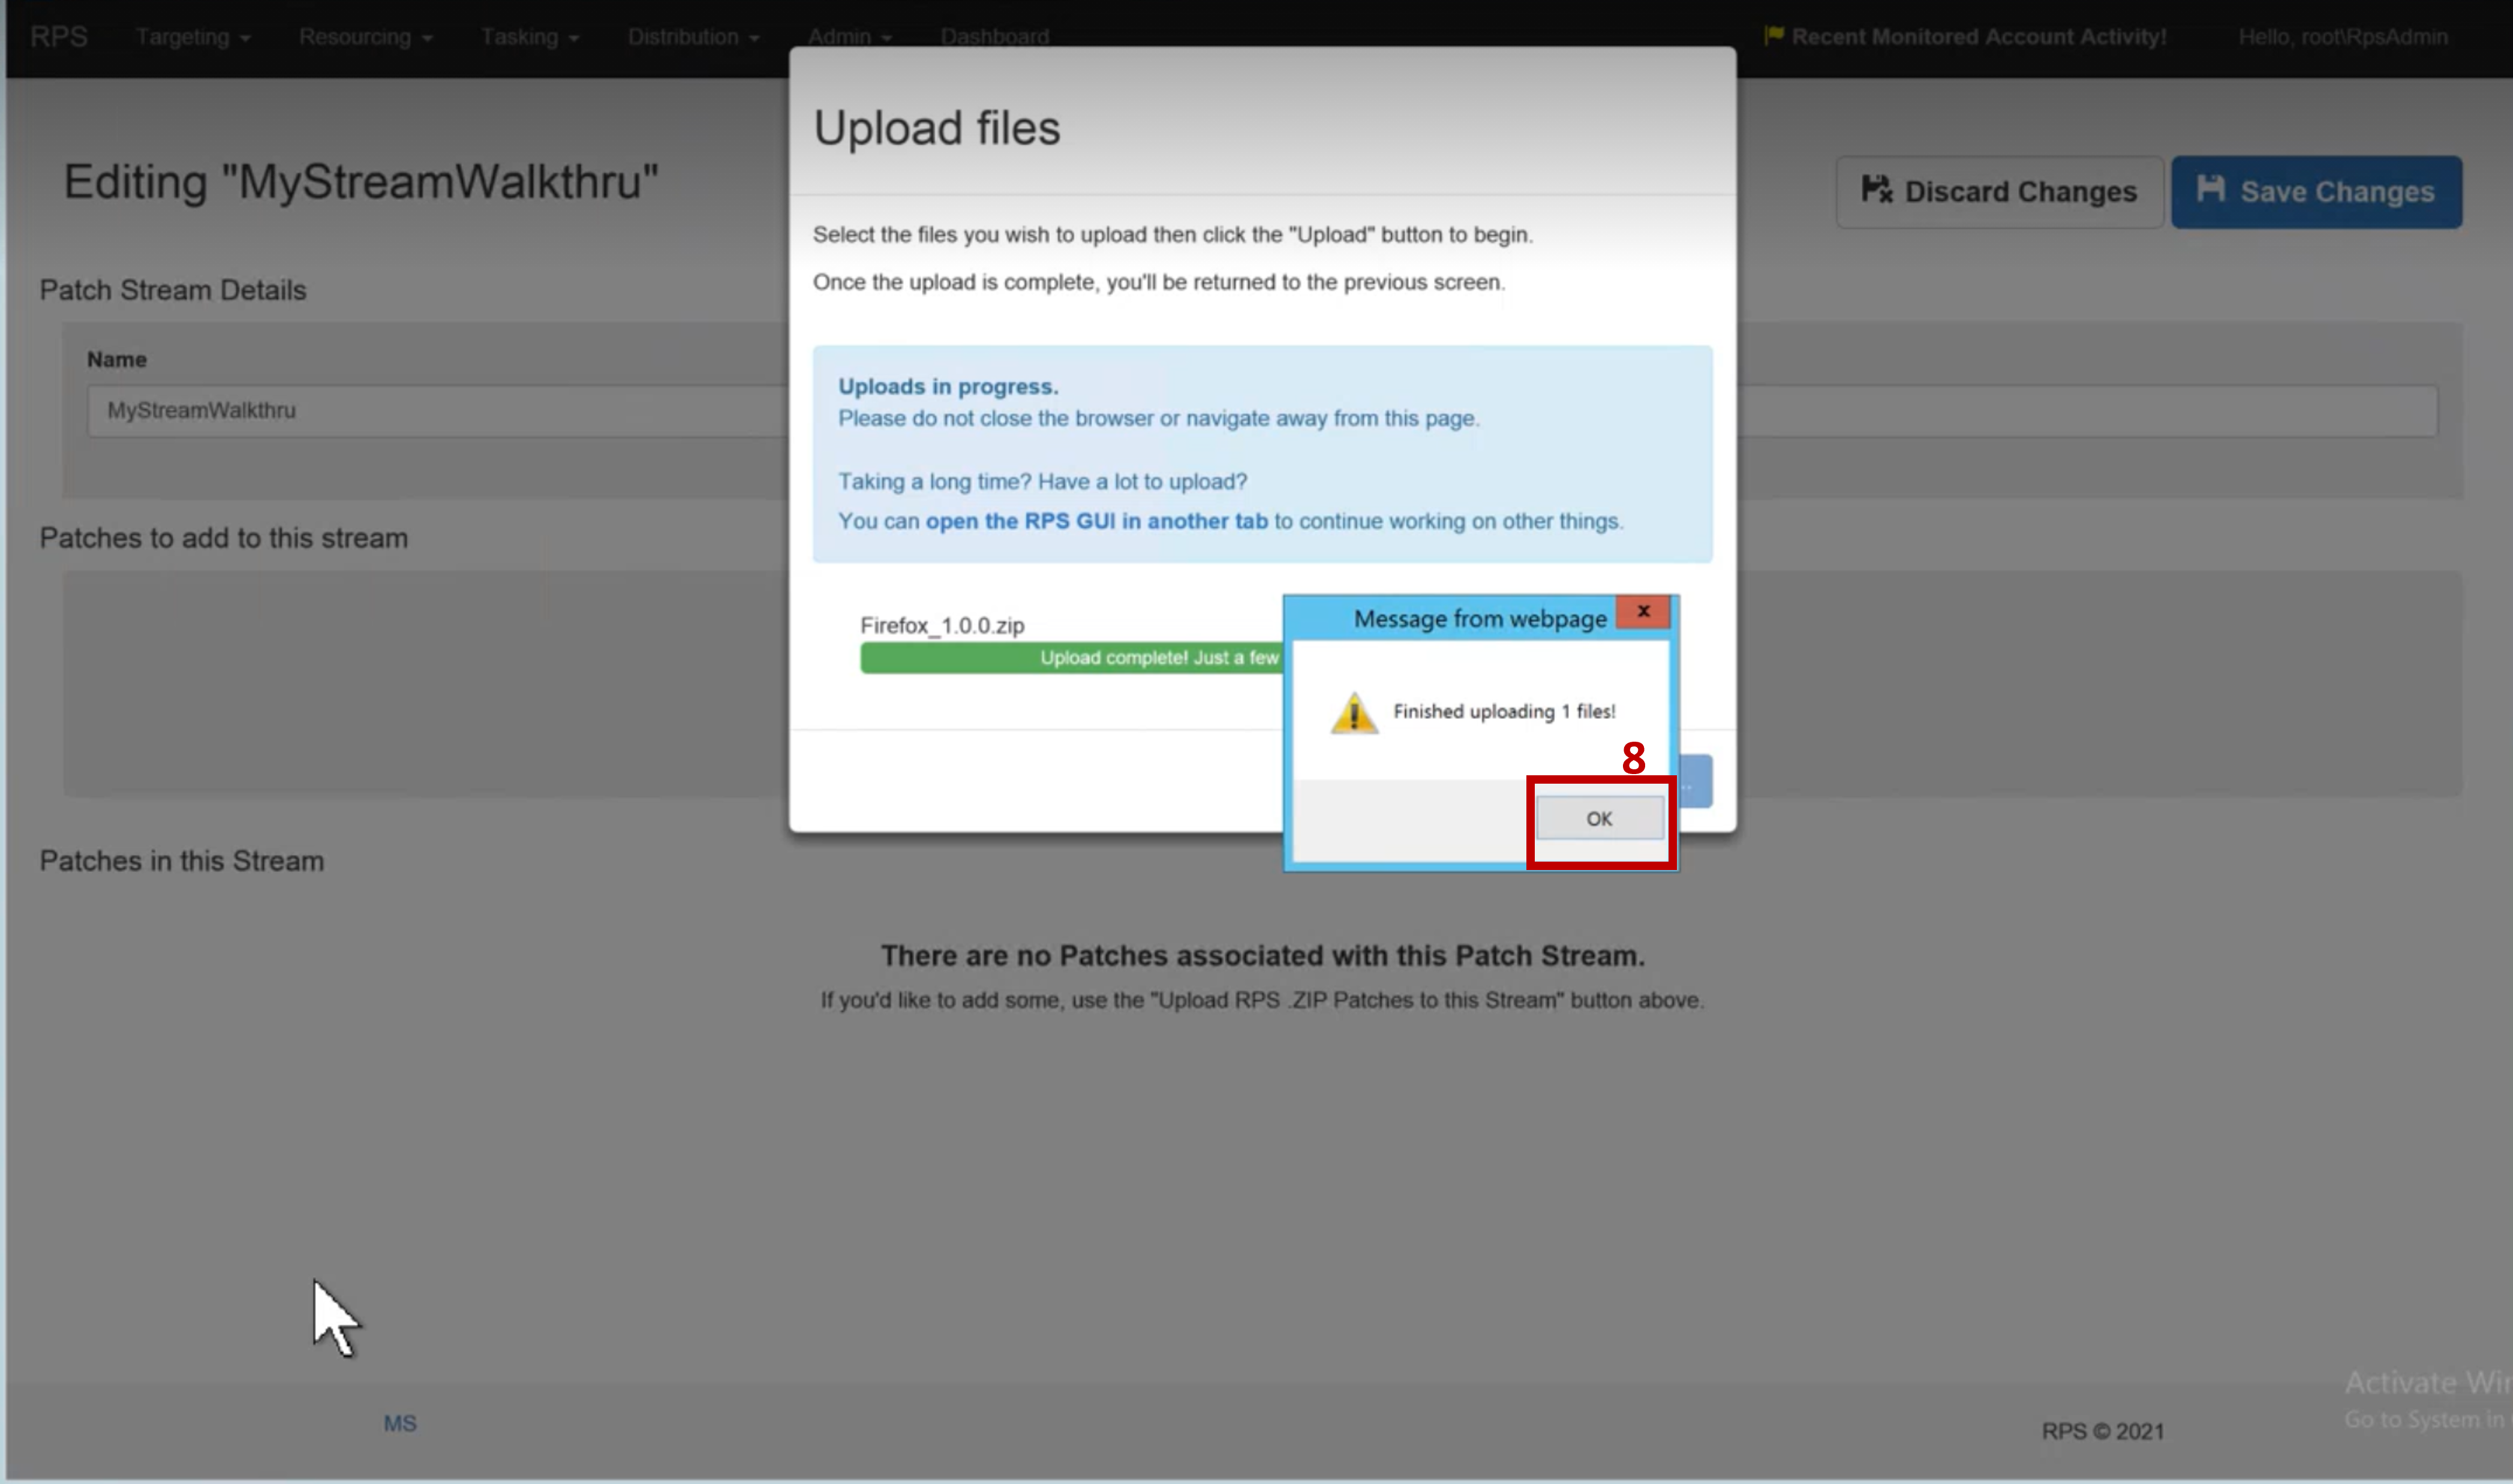
Figure 5: Finished uploading patch file(s).
Important
Do not navigate away from the page while uploads are in progress. You cannot submit partially uploaded patches. If you are uploading extremely large files, you can continue working by clicking the link "open the RPS GUI in another tab".
The upload modal will close and the patch stream editing page will refresh, showing the newly uploaded patches.
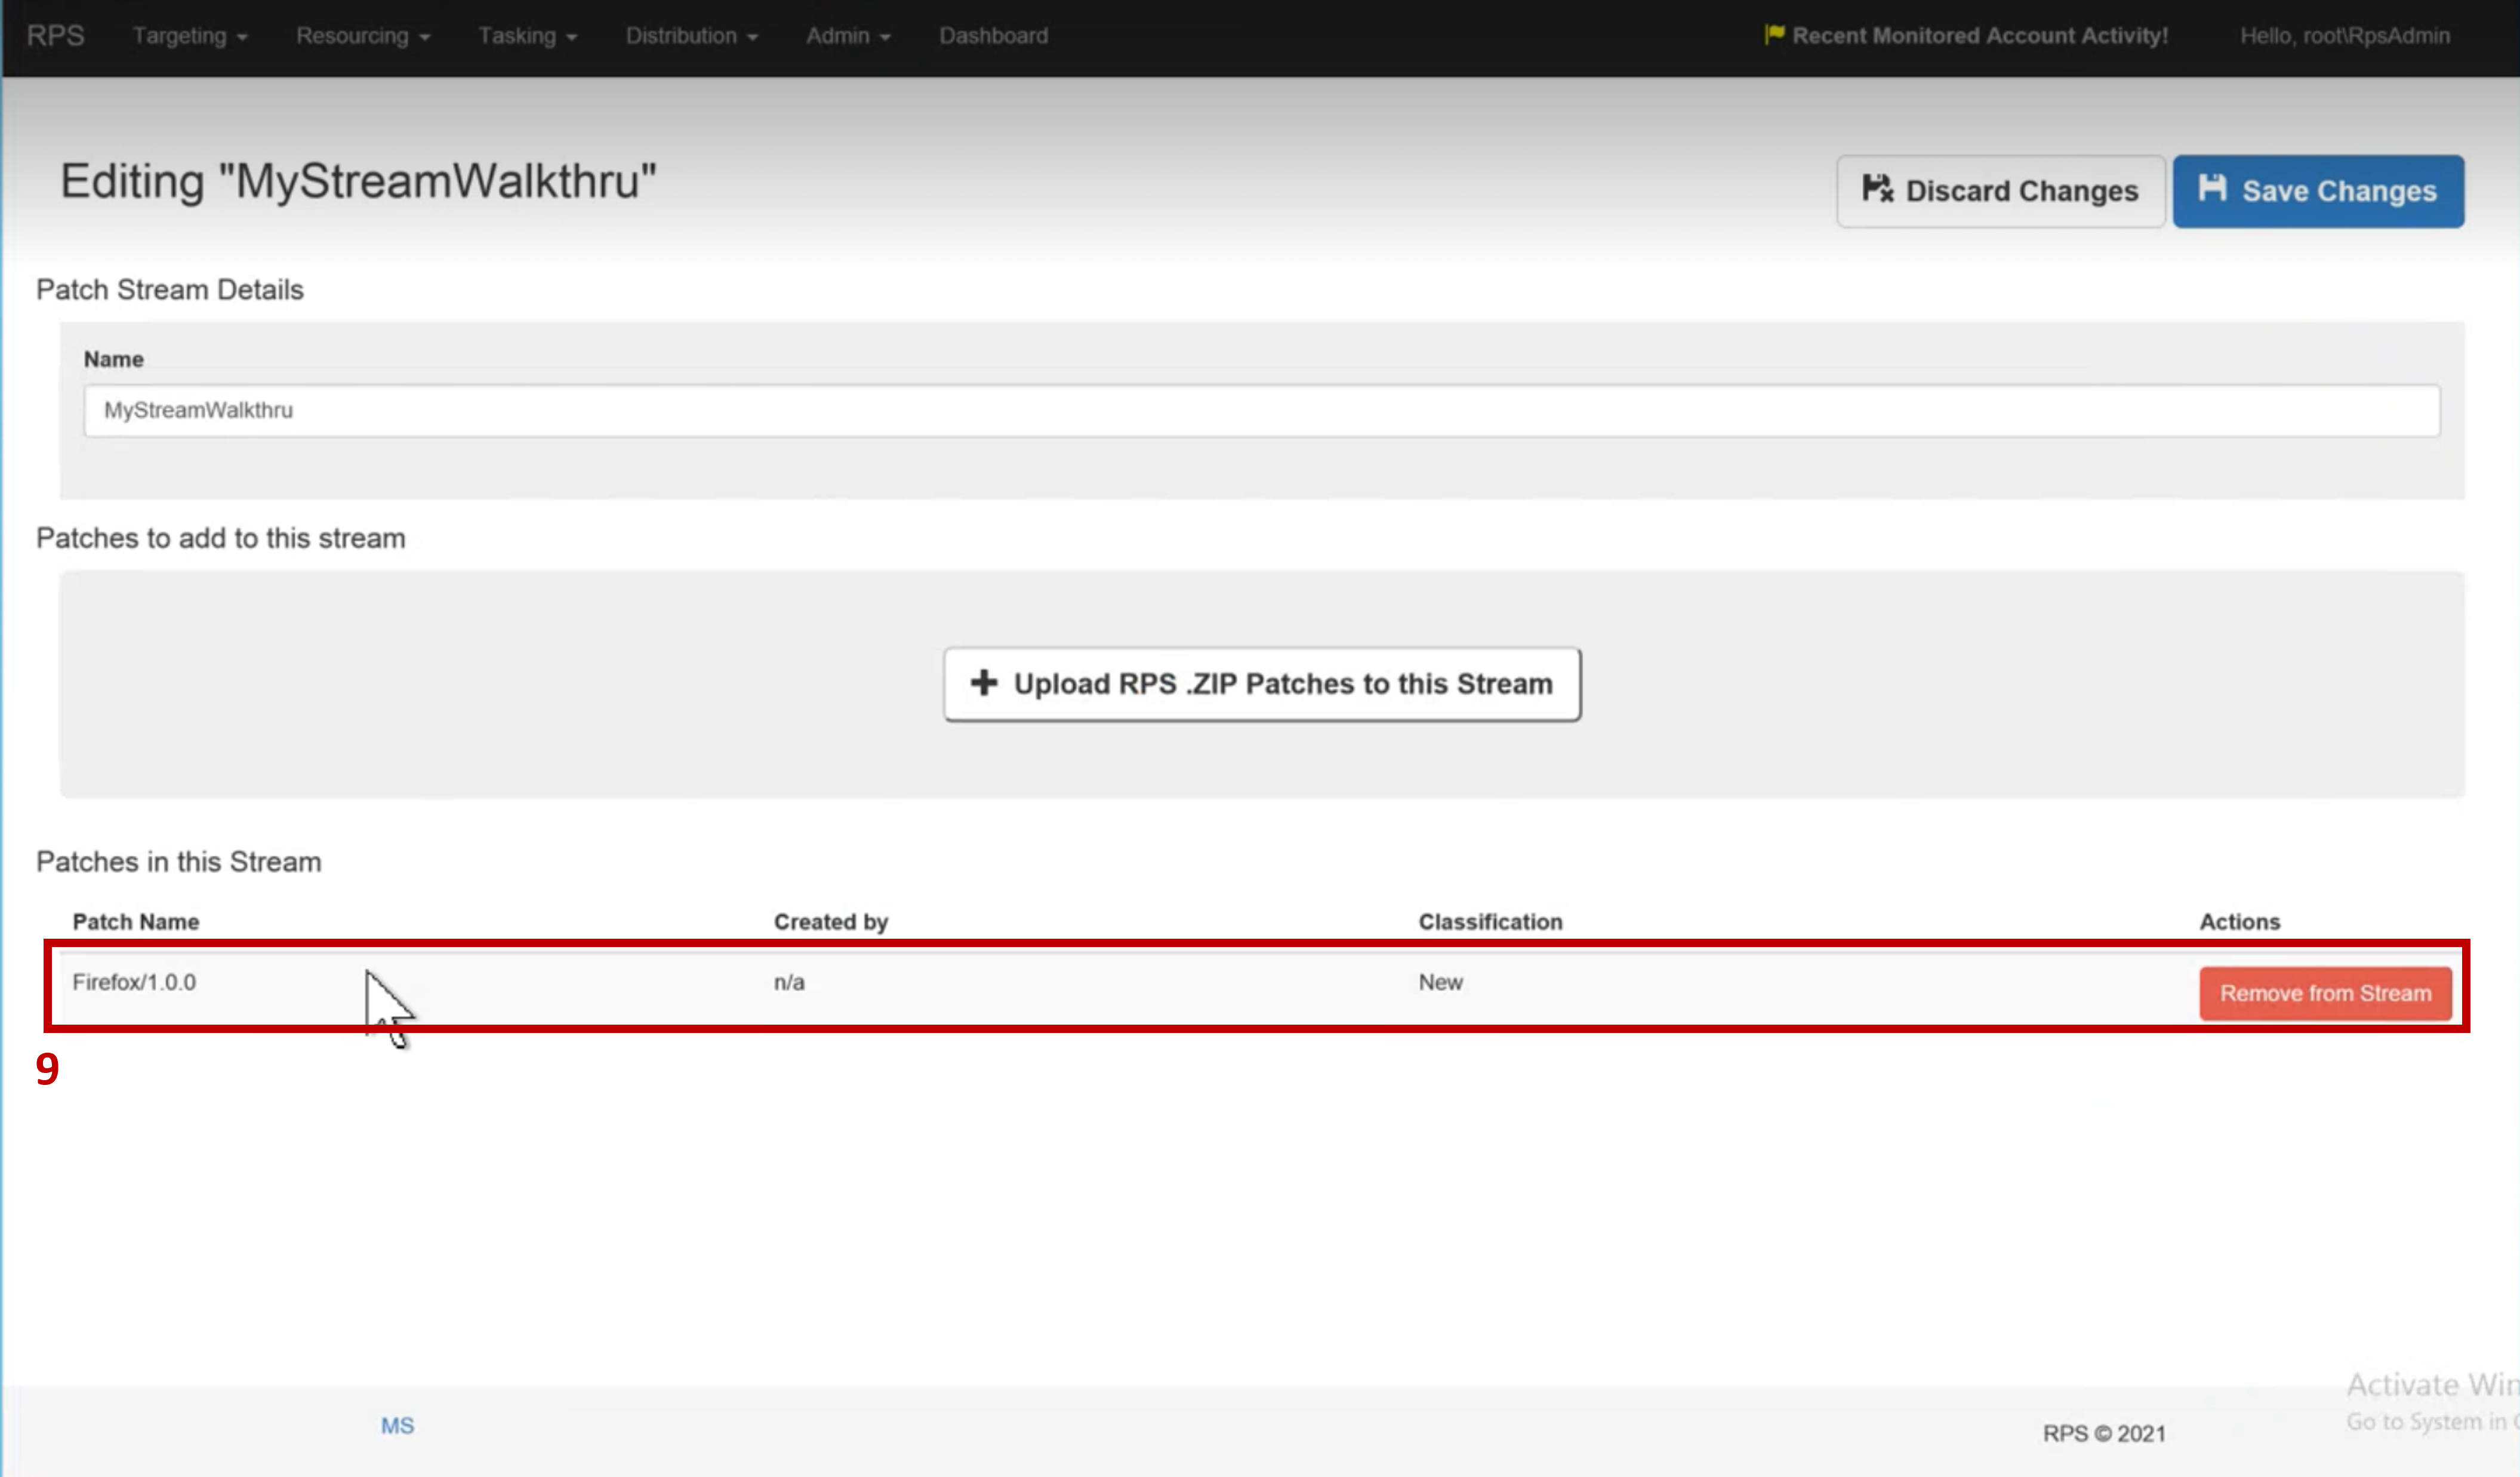
Figure 6: patch stream Edit form with uploaded patches.
If the patches provided are invalid, you will see errors specifying what values in the .Rps file are non-complicit.
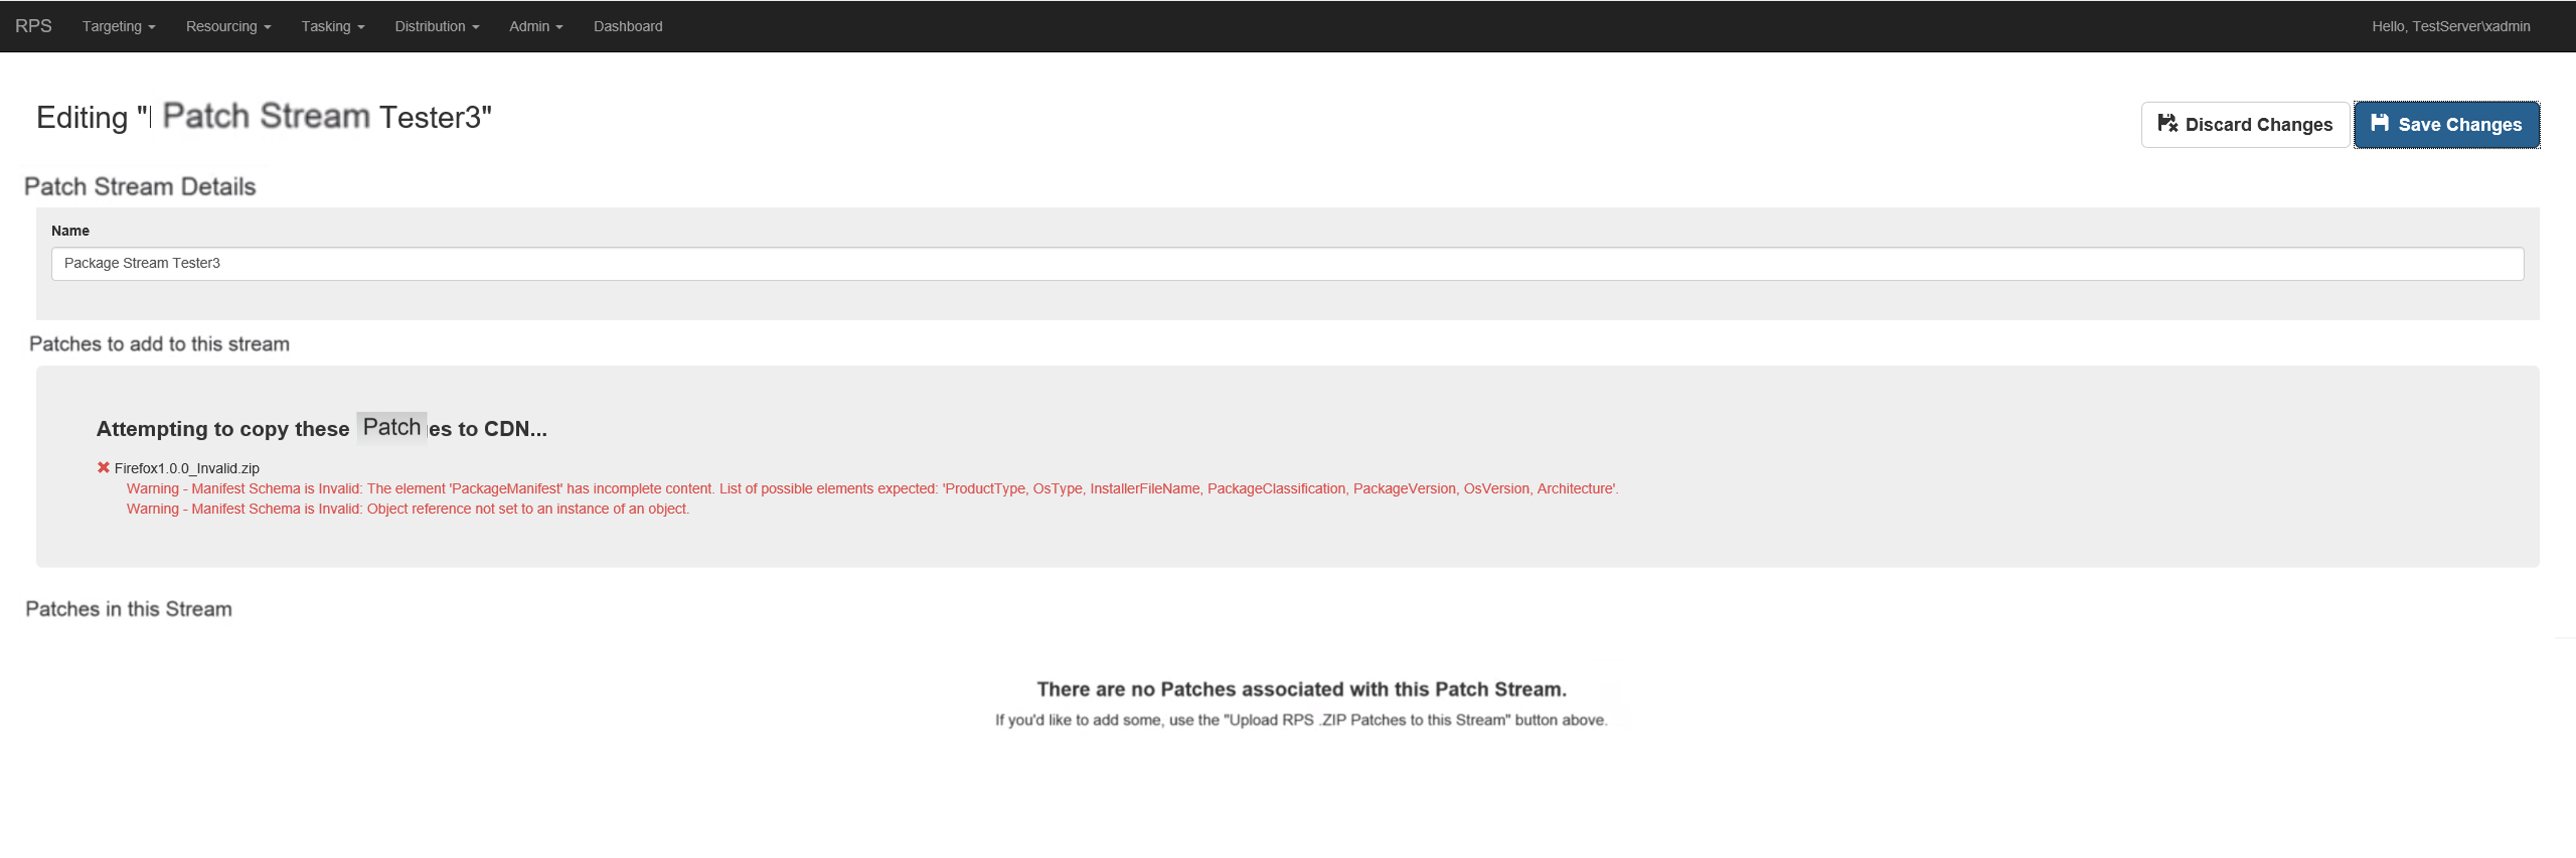
Figure 7: Uploaded patch showing validation exceptions.
NOTE: Uploaded files are stored in a temporary location. These files will be moved to the CDN once a patch stream is created. If a patch stream is created or updated, then the temporary patch uploads will be removed once they are copied to the CDN. If a patch stream is not completed created (e.g. the Save Changes button is not clicked), then the uploaded patches will remain in the temporary upload location for a configurable amount of time (default is 30 days). After the configurable amount of time has passed, the uploaded patches in the temporary upload location will be automatically removed.