Data Hydration
Last updated on March 28, 2022.
Last Reviewed and Approved on PENDING REVIEW
Introduction
Data Hydration is a service within the RDT, which provides the ability to hydrate the CMDB. This service is intended to be used before the provisioning process, to import existing data from a previous installation of RPS.
Usage
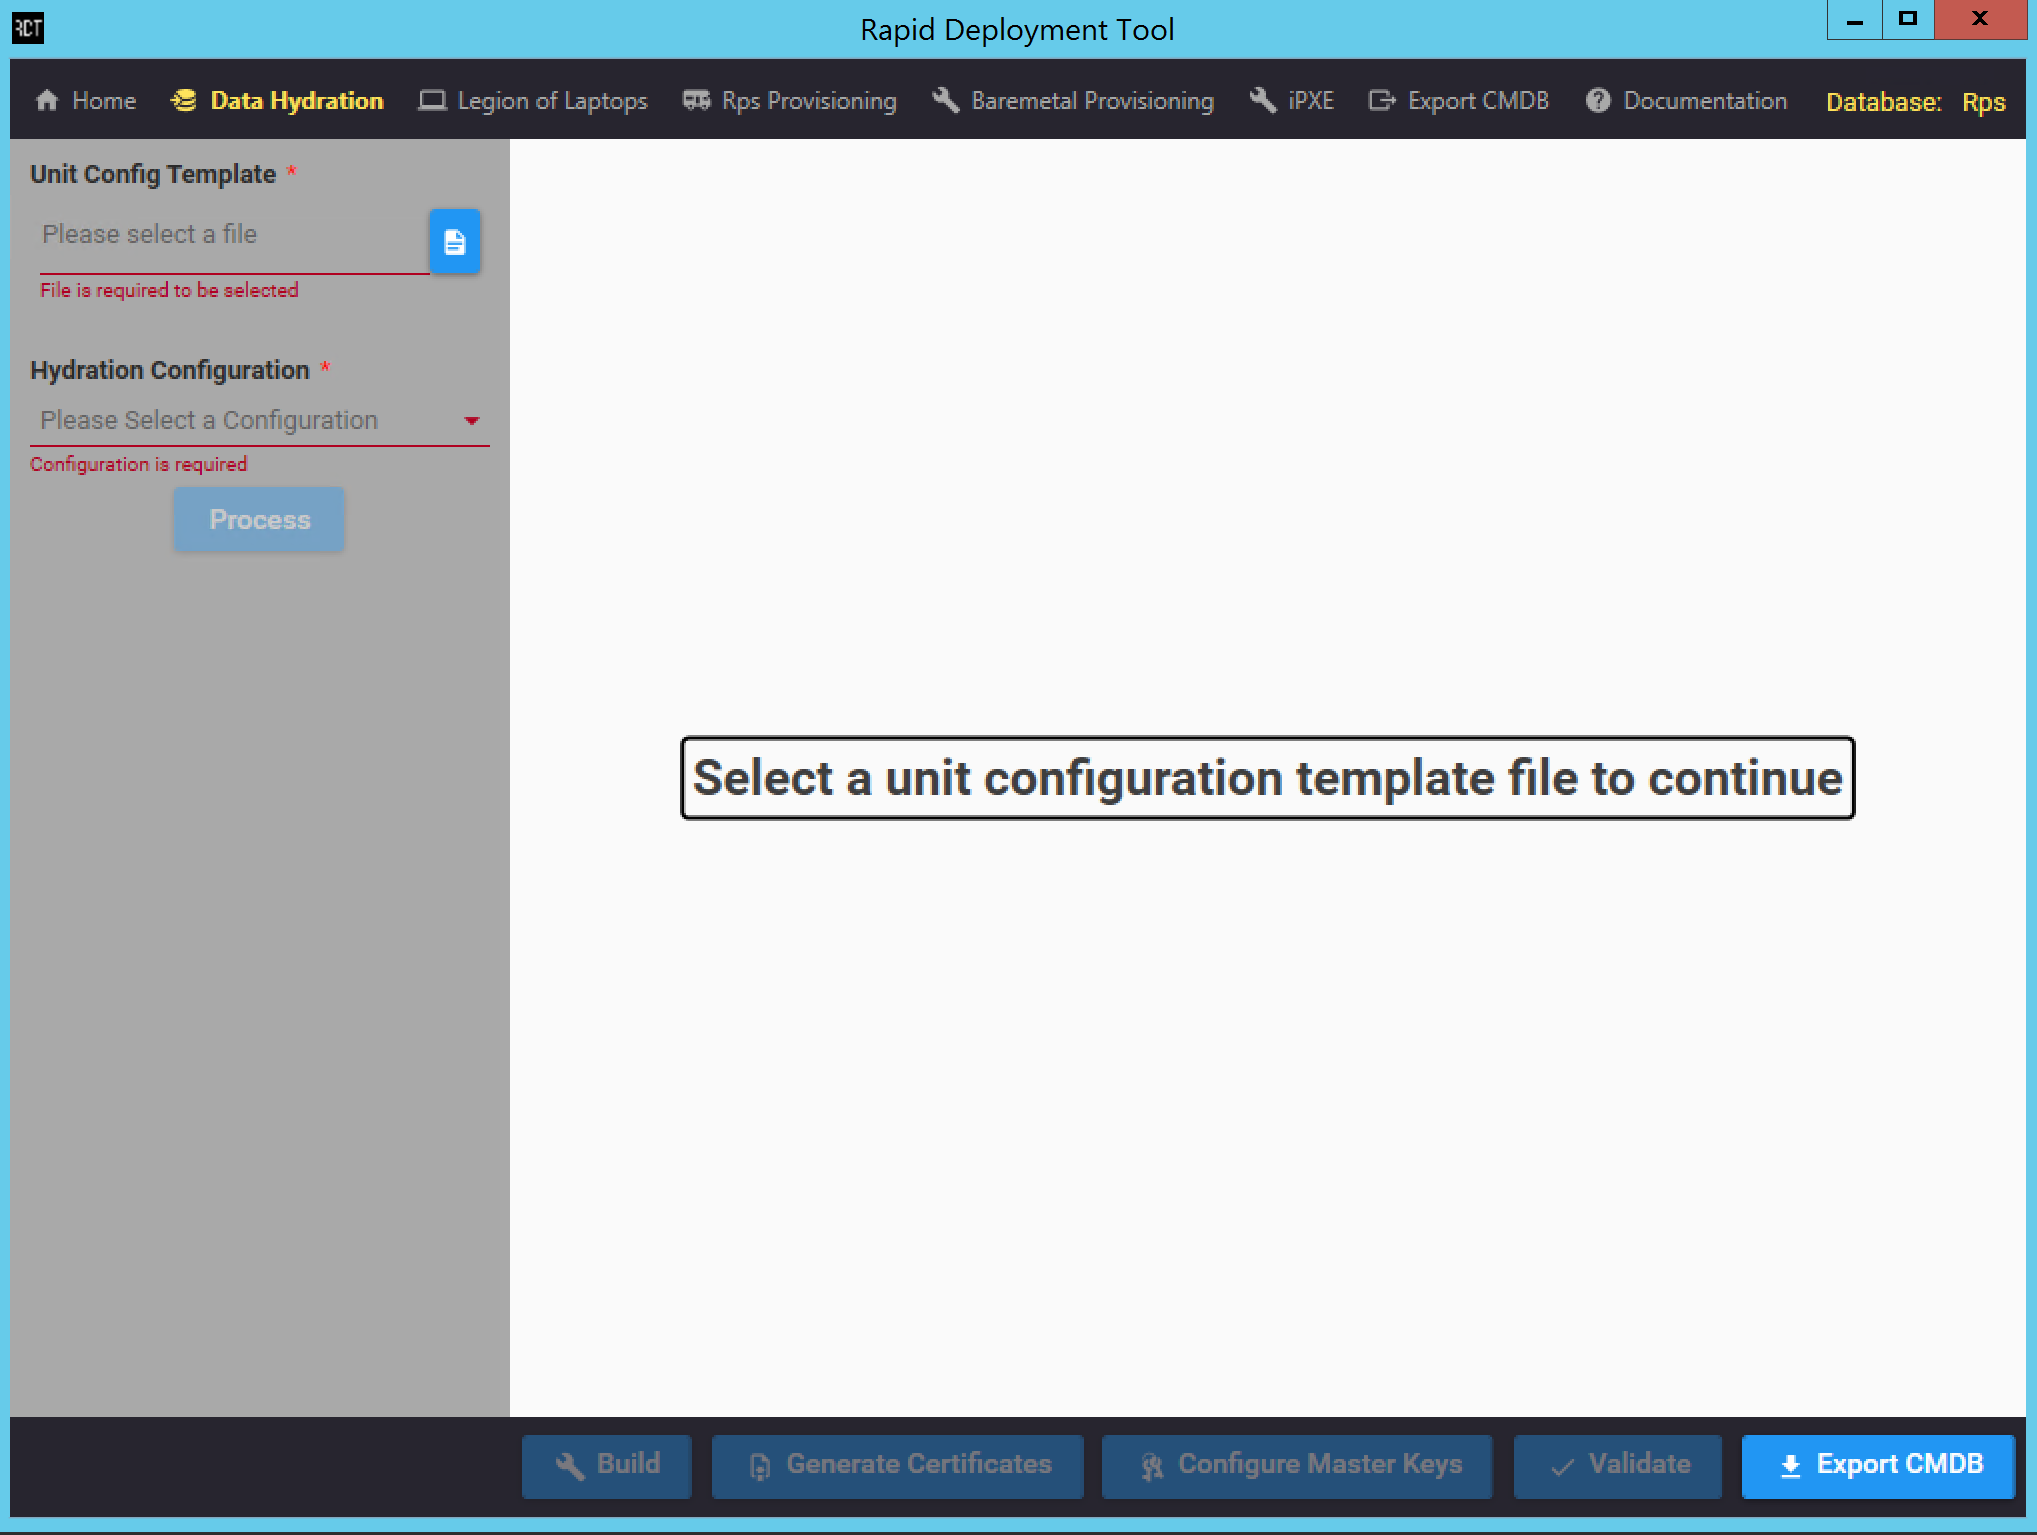
Figure 1: This is the initial view the user sees when first navigating to the Data Hydration page.
The specific fields present on the screen is dynamically populated from the Data Hydration Configuration file, located in the ContentStore\RDT\DataHydrationConfig.json.
Inputs
In order for the RPS data to be hydrated, the user must select an Instance Definition file containing the definitions they would like to hydrate. This is done via the Unit Config template input. Additionally, the user must supply the files containing the data which should be hydrated for the listed Instance Definitions as per the Data Hydration Configuration.
The Unit Config template input supports .xlsx, .xls, and .csv file types. The other inputs support filetypes as listed in the Data Hydration Configuration file.
Once the Unit Config template file has been uploaded, the table on the right displays the data read in from the file. See Figure 2 for an example of this with a single Instance Definition:
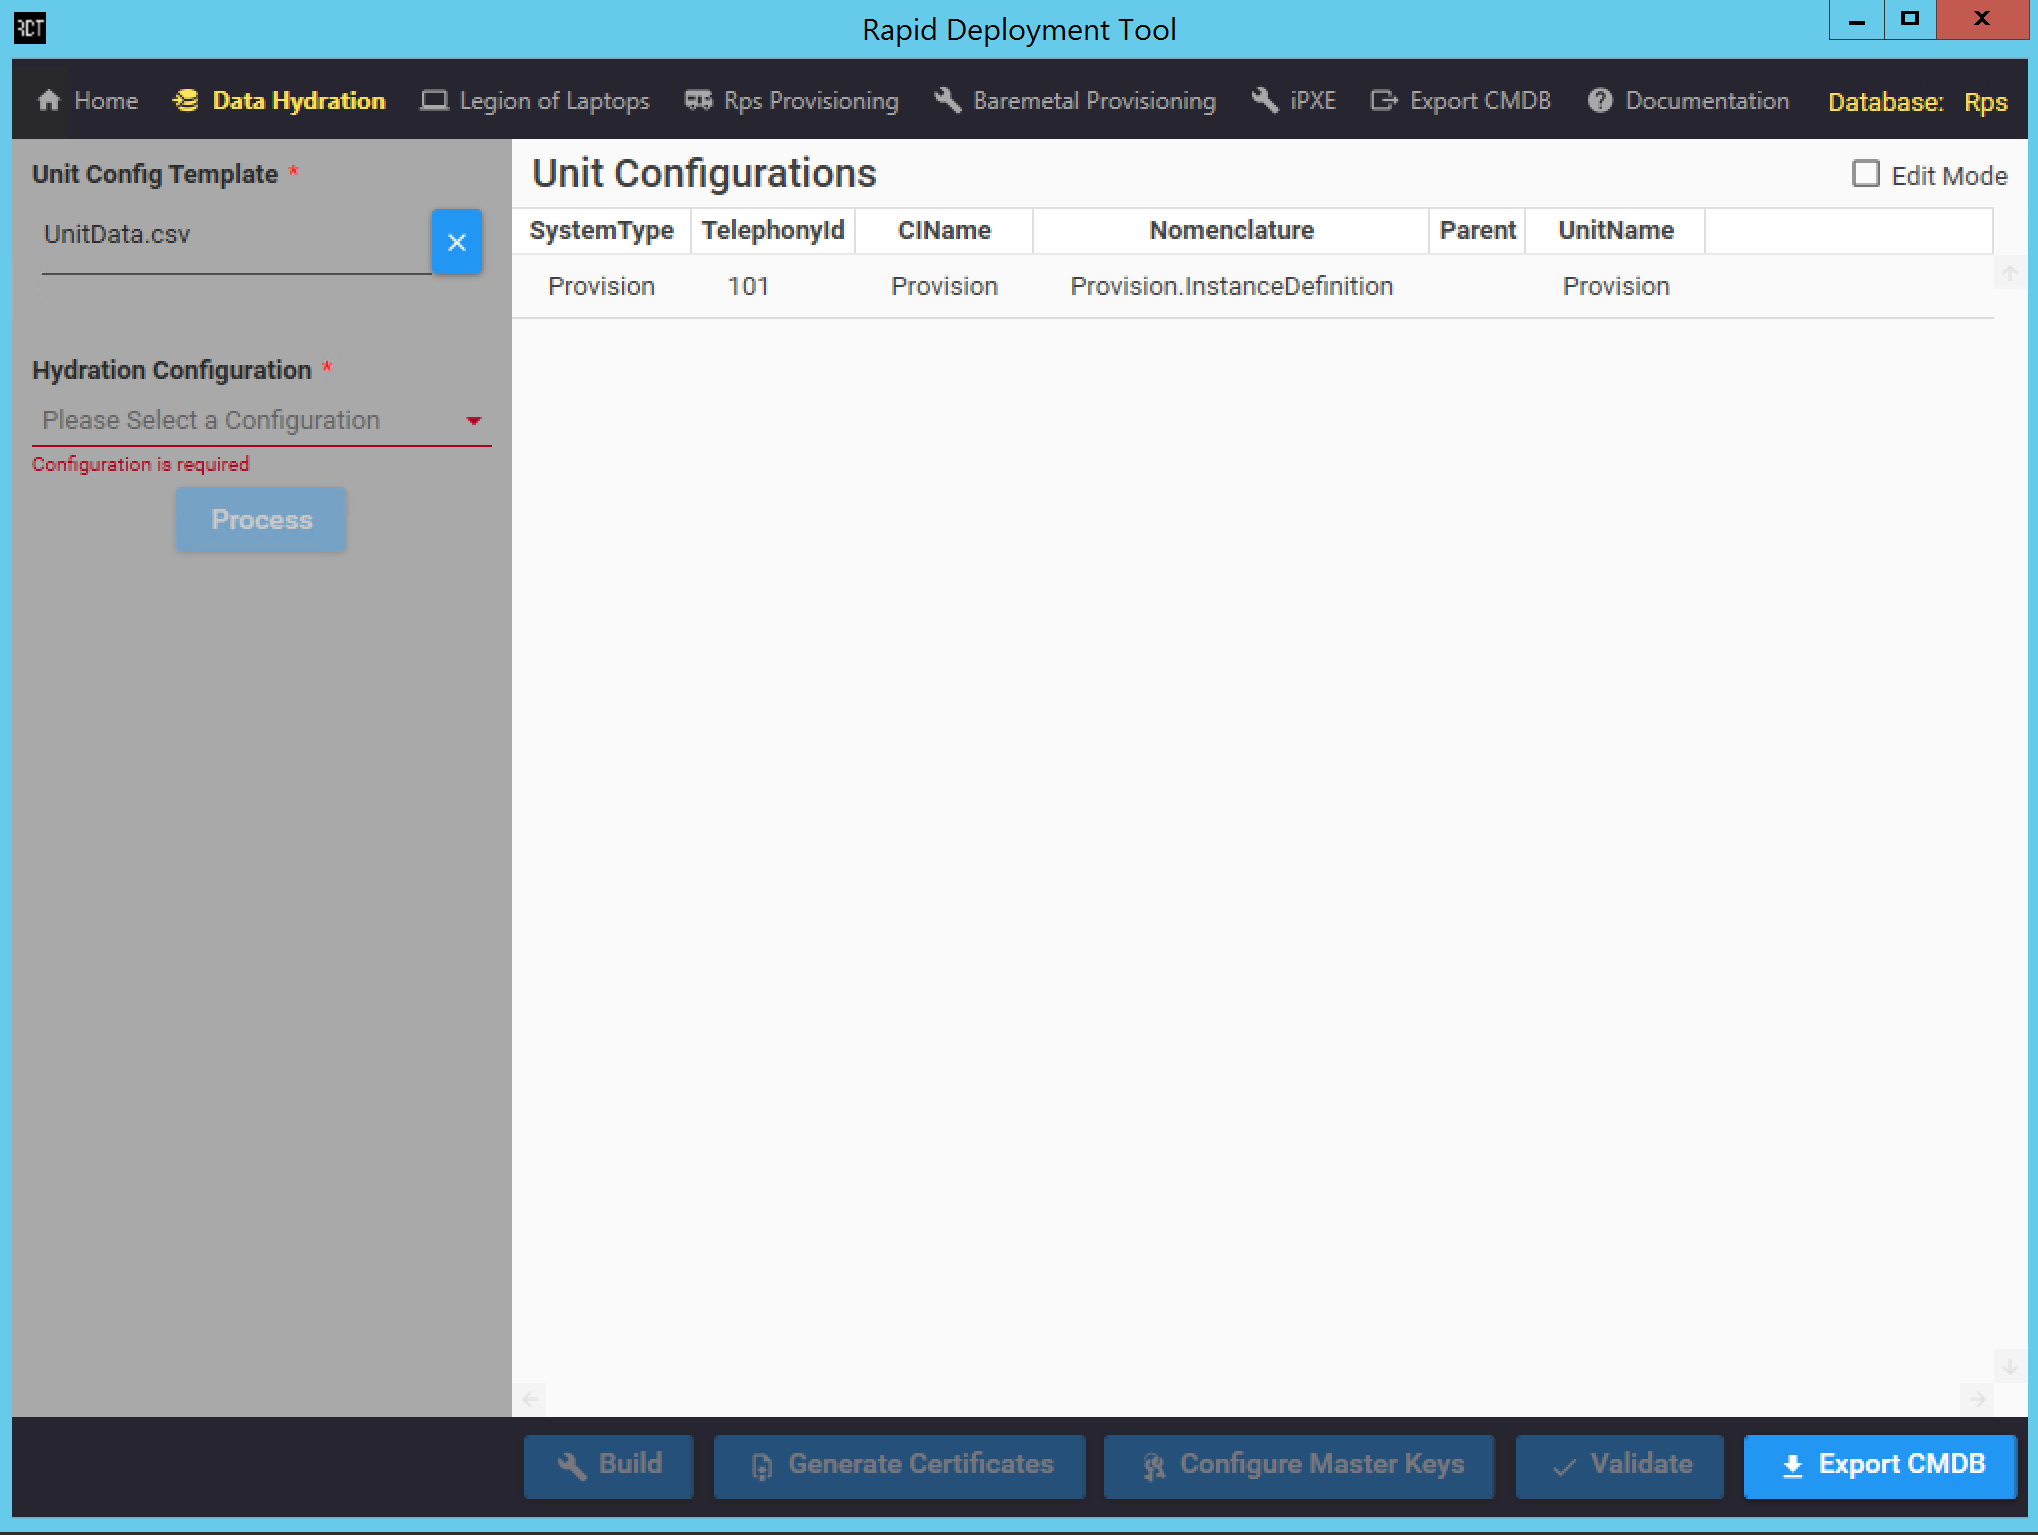
Figure 2: An example of a populated Instance Definition table. In this case, there is only 1 Instance Definition in the uploaded Unit Config template.
Starting the Hydration Process
Once all inputs have been selected, press the Process button to read in the data and prepare for the hydration.
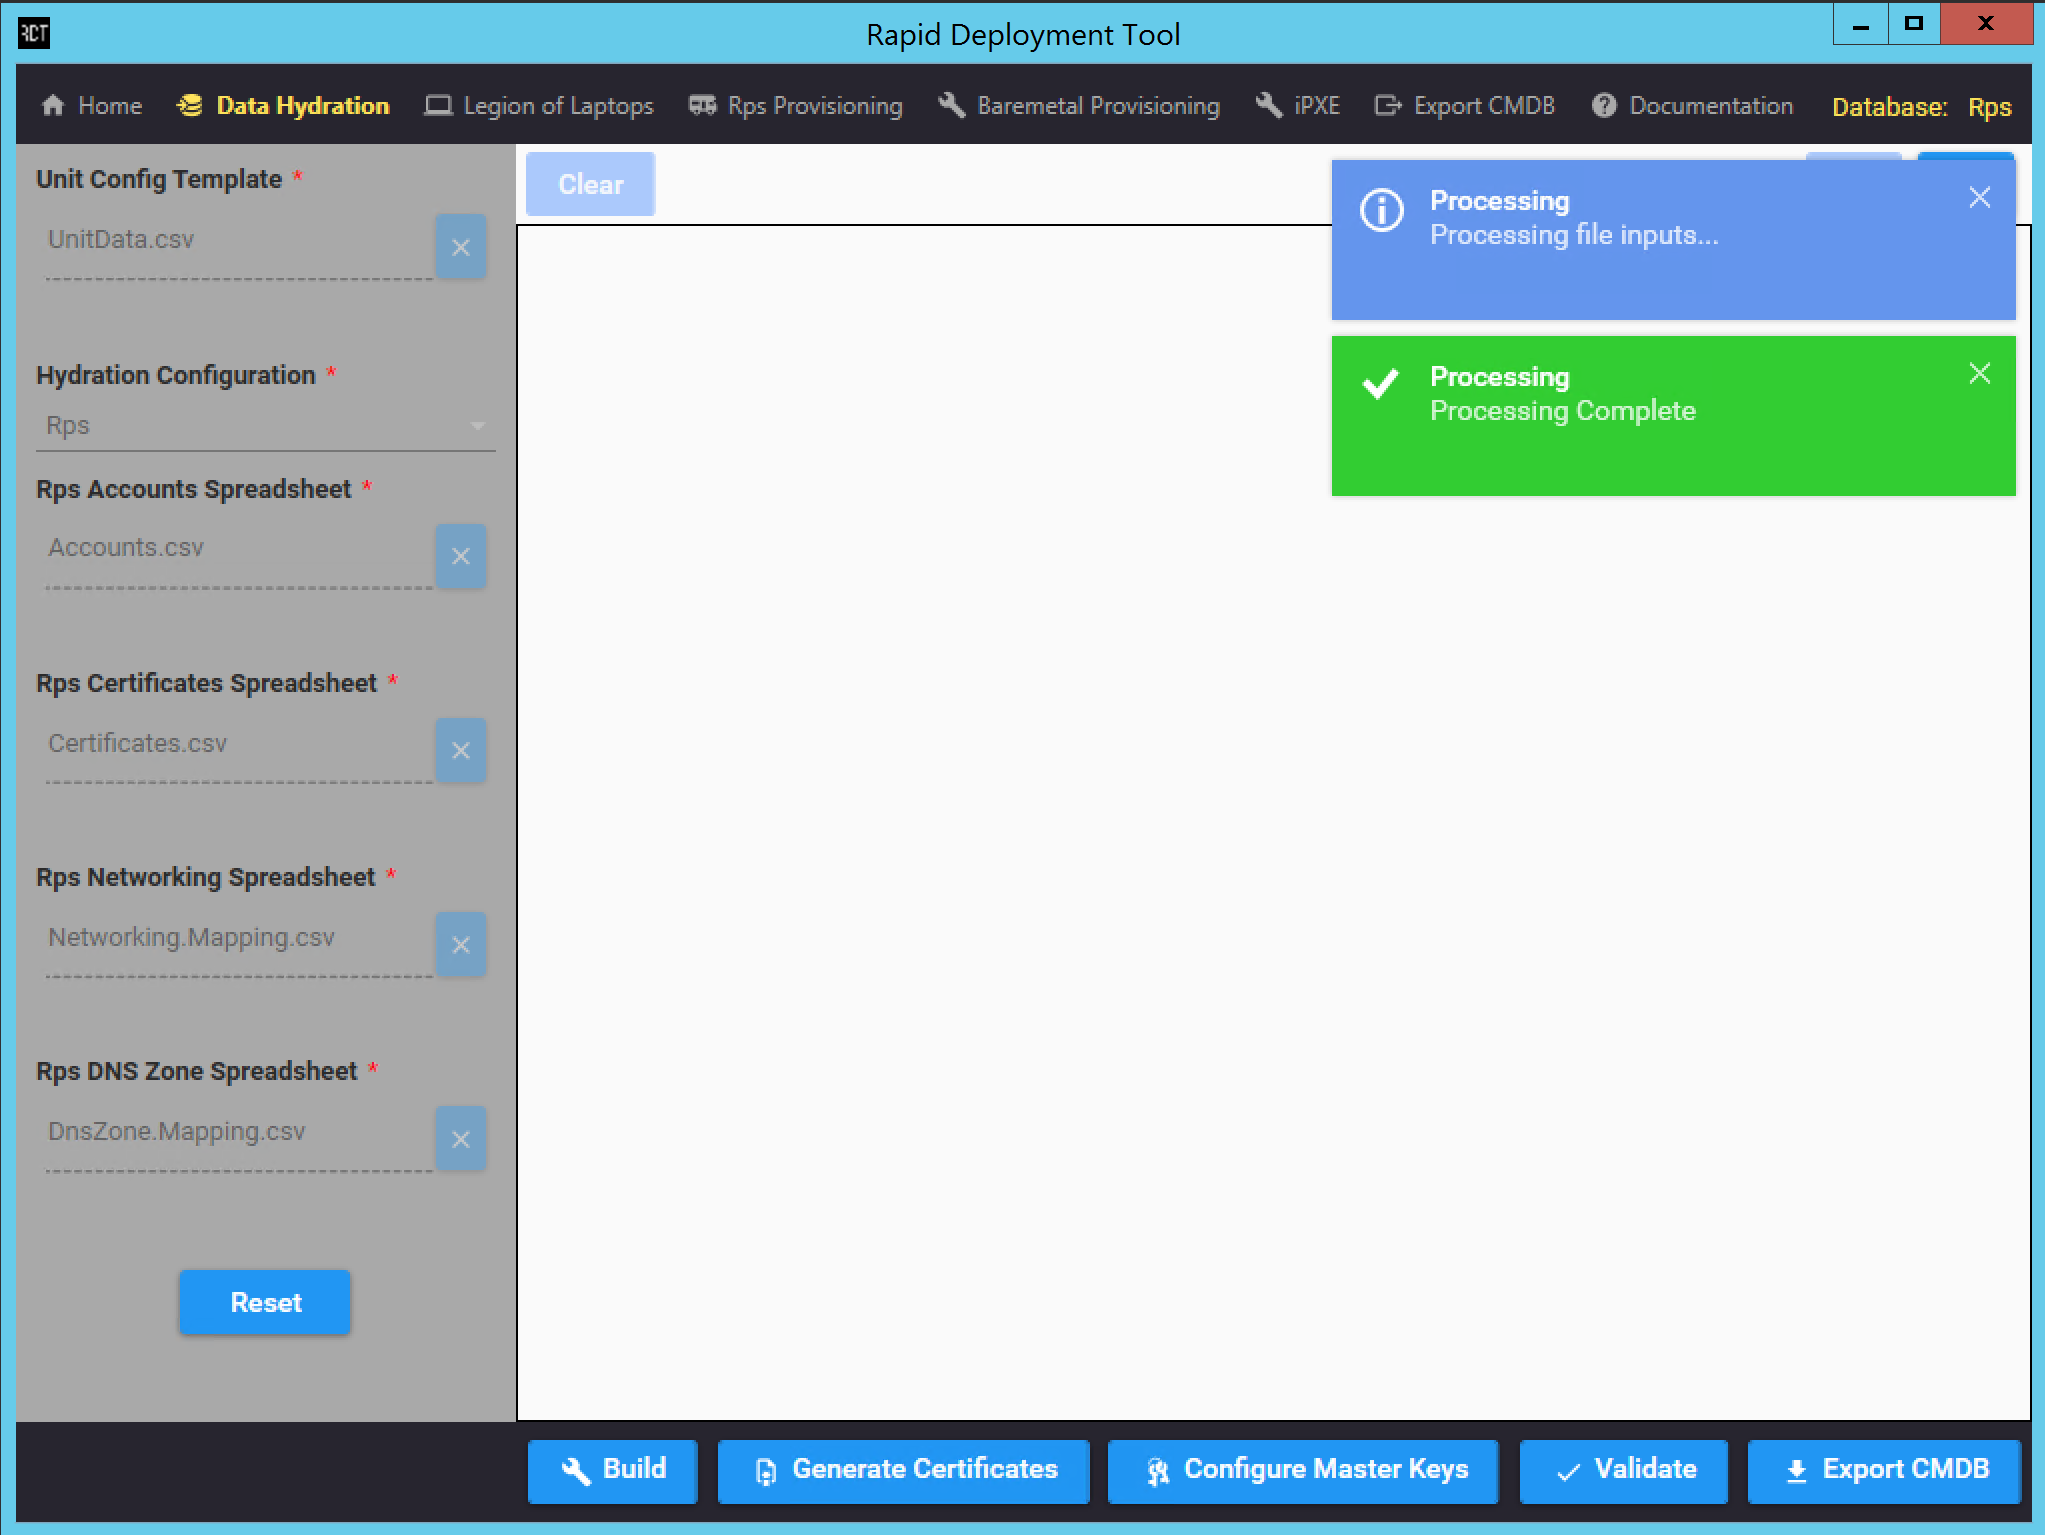
Figure 3: Processed Data Hydration.
Once the input fields have been processed, they can no longer be changed. In order to modify an input field once the Process button has been selected, the Process button becomes the Reset button. Pressing "Reset" clears all inputs and return the Data Hydration screen to the original default view.
Upon processing the data, the Instance Definition table will be hidden and the console will be shown. Toast status messages appears in the top right showing the status of the processing and whether it succeeded or failed.
Data Hydration Order of Operations
The order of operations for a Data Hydration process is Build → Generate Certificates → Configure Master Keys → Validate.
1. Build
When the Build button is selected, the Instance Definition and the data mappings listed in the input sheets are imported into the CMDB. The progress is tracked through log statements, which appear in the console. An example of a successful build is shown in Figure 4:
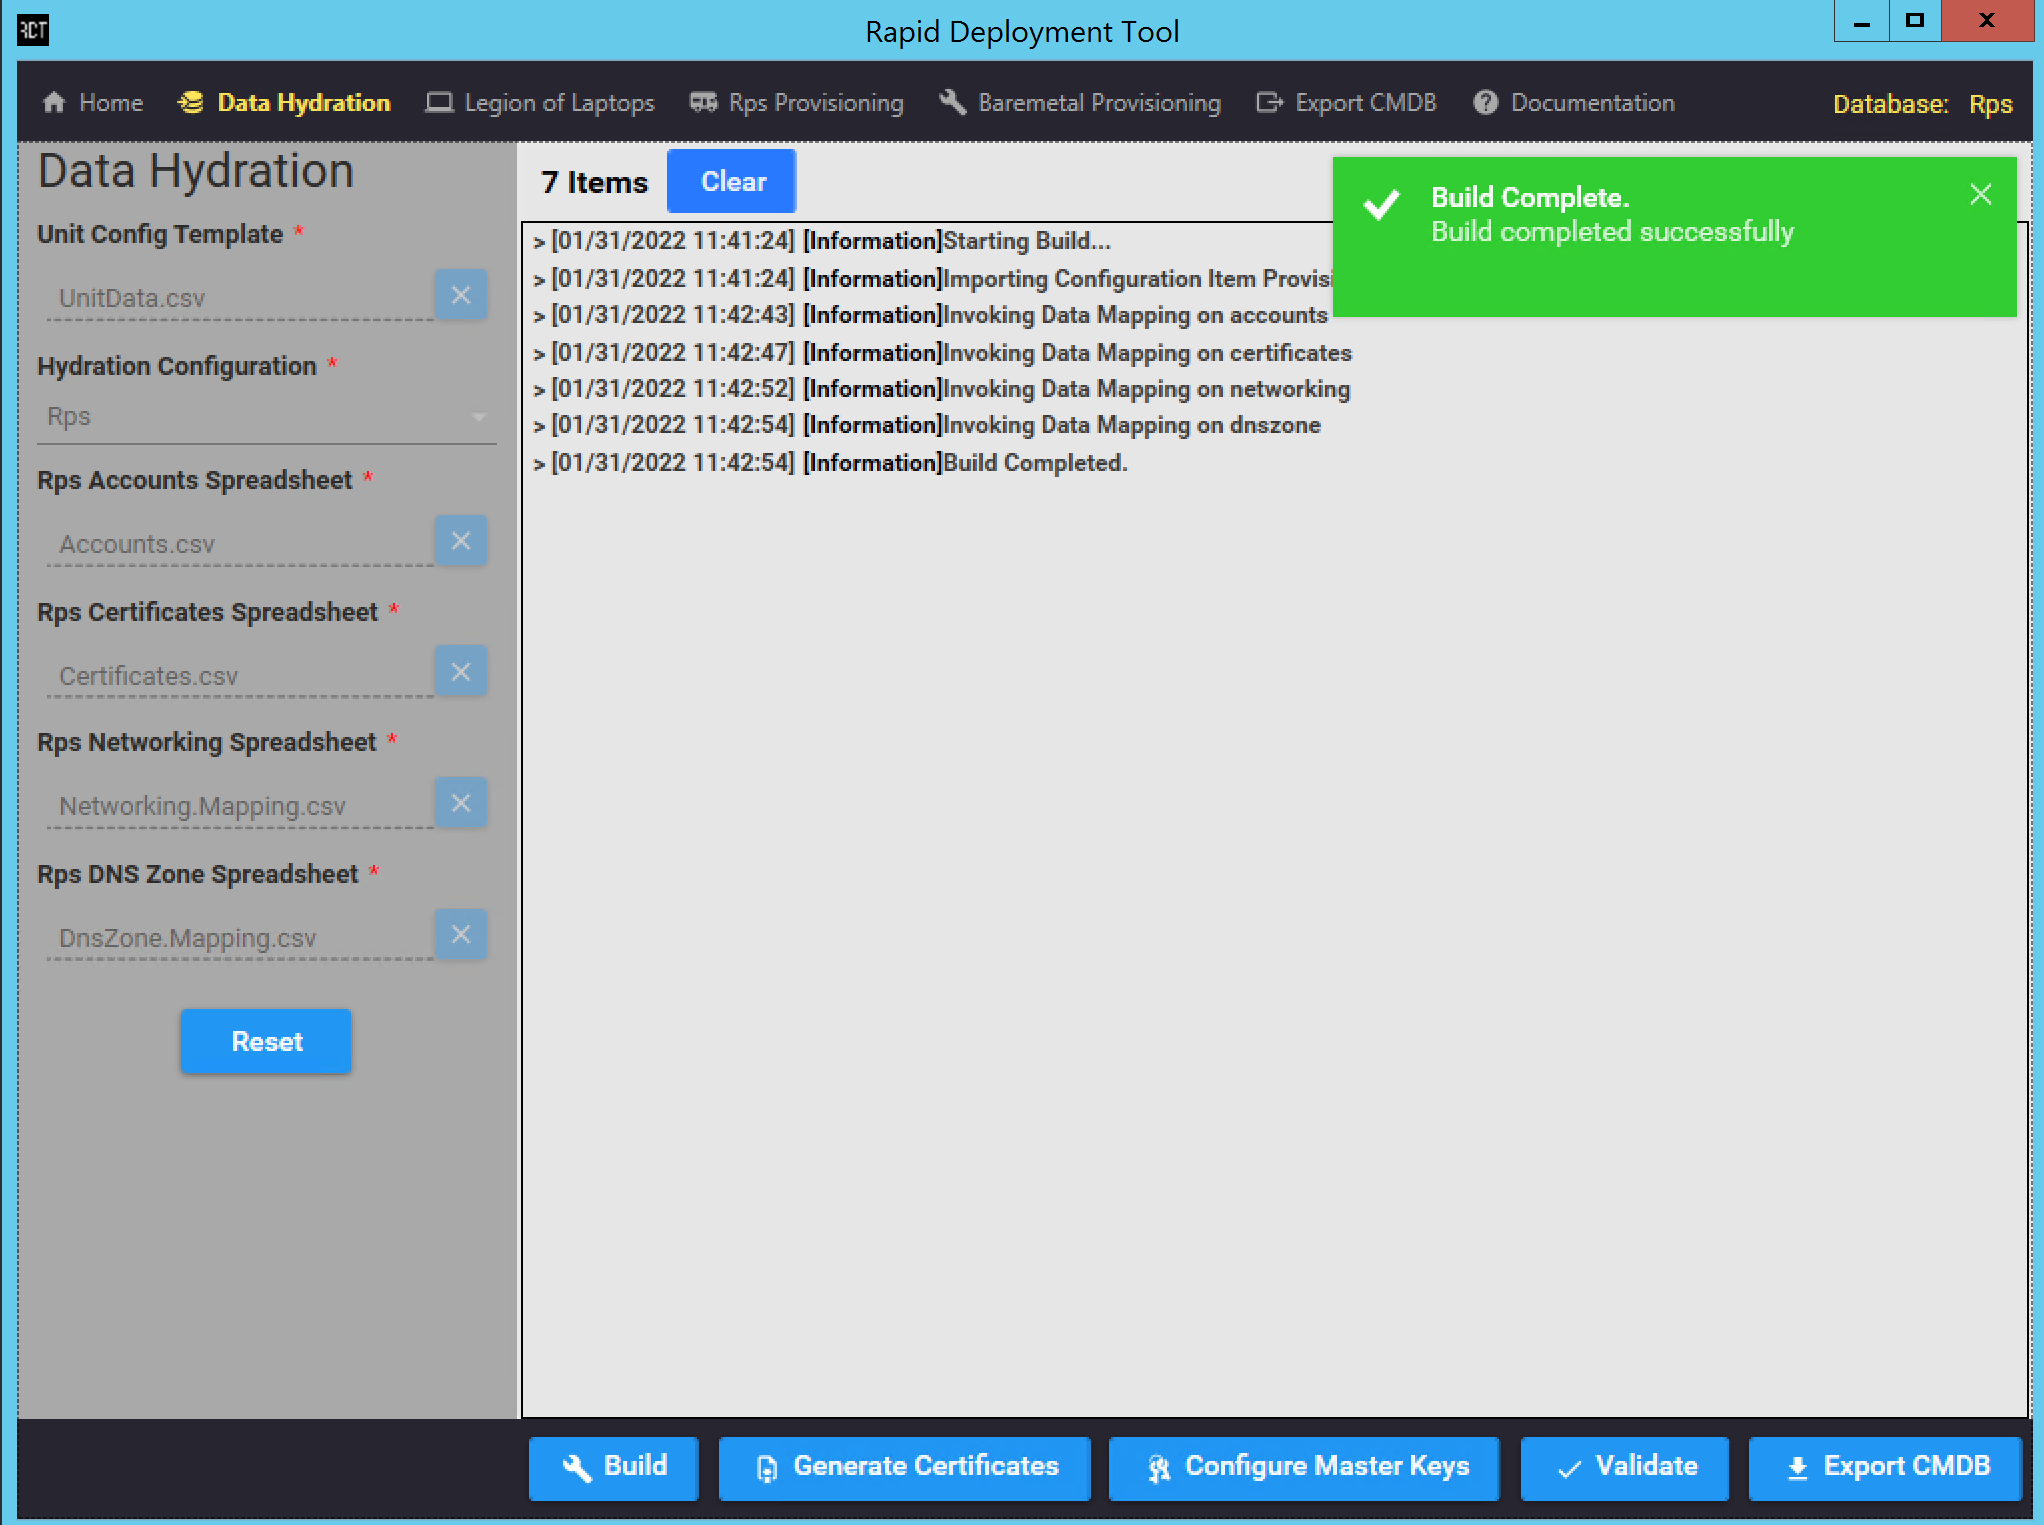
Figure 4: Successful build.
If the build fails, a toast message appears stating that the build failed, in addition to a console log message. See Figure 5 for an example of this:
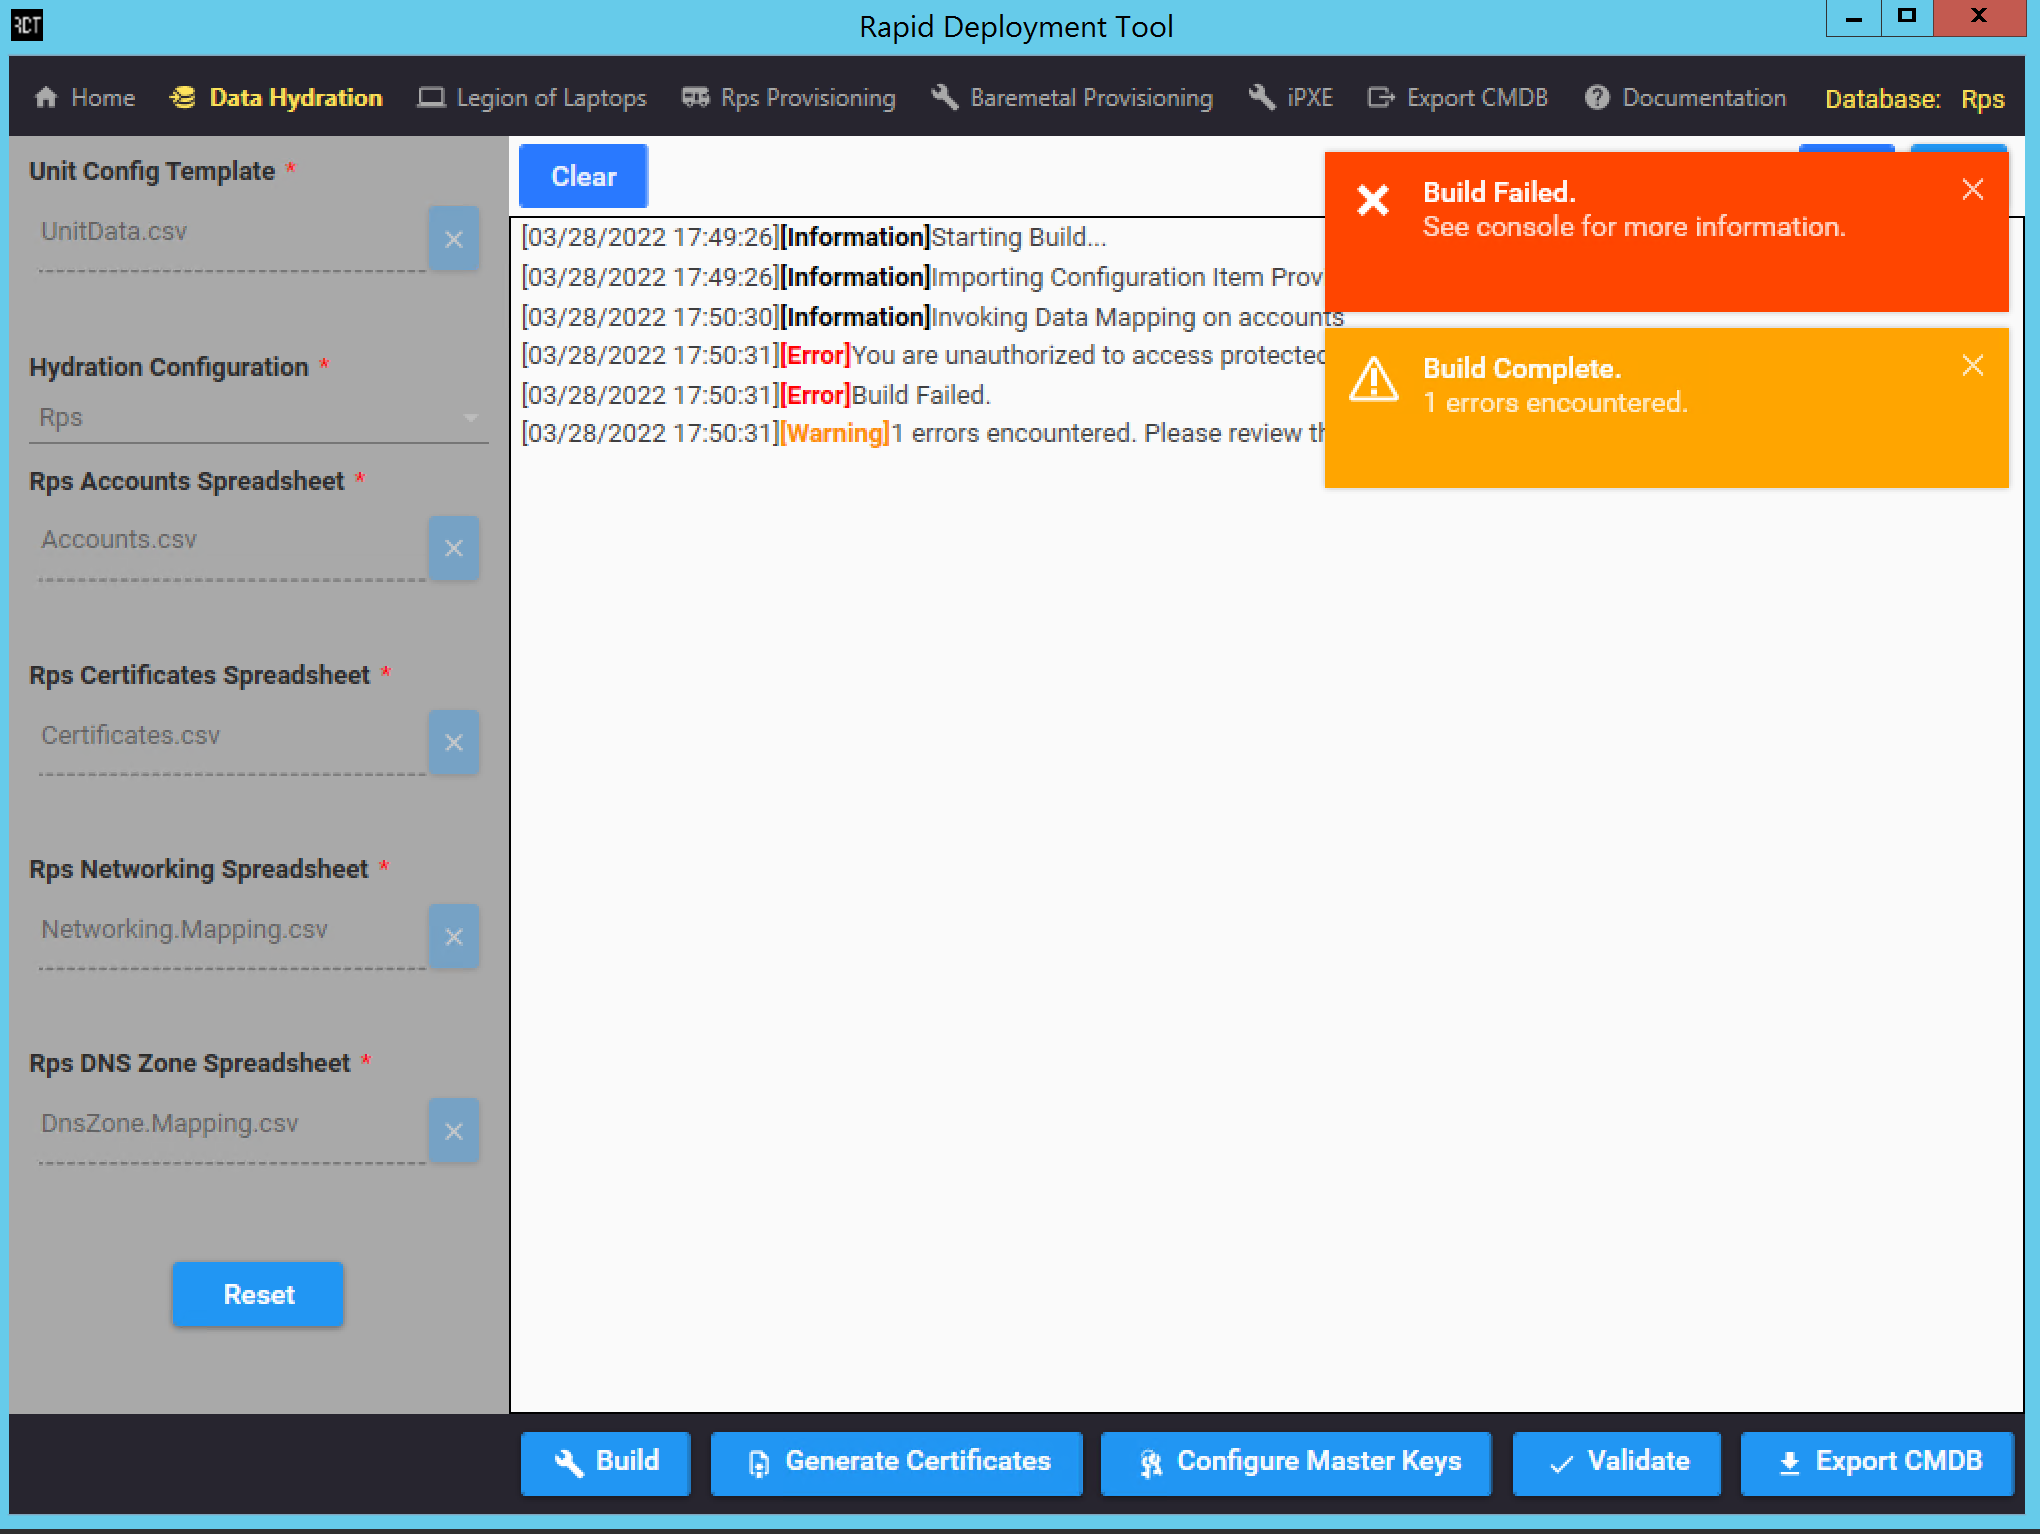
Figure 5: Build failure.
Note
Error messages in the console are shown in an orange font.
2. Generate Certificates
Once the build has succeeded, self-signed certificates need to be generated. This can be done by clicking the "Generate Certificates" button. Upon pressing this button, a PowerShell window appears that shows the output of this operation. The user needs to press the Enter key to close the PowerShell window. Any errors in the script would be displayed in the PowerShell window and is not visible in the console log window on RDT.
3. Configure Master Keys
Once the certificates are generated, Master Keys needs to be configured. This can be done by clicking the "Configure Master Keys" button. This opens a PowerShell window which displays the output of the operation. Like Generate Certificates, this PowerShell window does not exit until the user presses the Enter key, and all relevant messages and errors would be displayed in the PowerShell window, not on the RDT console log.
4. Validate
Once the previous steps have been completed, the user can press the Validate button to begin the validation process. The result of this process would be displayed in the console log window.
Export CMDB
Please refer to Export CMDB
Data Hydration Configuration File
The Data Hydration Configuration file is used to configure the inputs that appear on the Data Hydration screen. An example file is shown below:
{
  "ImportFields": [
    {
      "Name": "Input 1",
      "DisplayName": "The First Input",
      "FileTypes": [
        ".xlsx",
        ".xls",
        ".csv"
      ],
      "Description": "Some description",
      "WorksheetMappings": [
        {
          "DestSheetName": "Input1",
          "SourceSheetName": "sheet1"
        }
      ],
      "DataMappings": [
        {
          "Table": "Tablename",
          "MappingName": "Tablename.mapping.json",
          "FilterName": "filtername",
          "CIName": "ciname"
        }
      ]
    }
  ]
}
The Data Hydration Configuration file contains the following fields:
- ImportFields: An array of the input fields present on the Data Hydration screen. Each entry in this array corresponds to a new file input on the screen. This field is required. This is the only allowed root property. Each object in the array must be unique. The properties listed below are the only valid values in each object of this array.
- Name: The name of the input. Type is a string. This field is required.
- DisplayName: The text to display above the input on the Data Hydration page. Type is a string. This field is required.
- FileTypes: The array of supported filetypes. Must have at least a single item. The available options are: ".xlsx", ".xls", and ".csv". This field is required.
- Description: The description for this input. Type is a string. This field is required.
- WorksheetMappings: The array of worksheet mappings for the input file. Must have at least a single item. Each object in the array must be unique. The properties listed below are the only valid values in each object of this array. This field is required.
- DestSheetName: The destination worksheet name. Type is a string. This field is required.
- SourceSheetName: The worksheet name in the input file. Type is a string. This field is optional.
- DataMappings: The array of data mappings for the input file. Must have at least a single item. Each object in the array must be unique. The properties listed below are the only valid values in each object of this array. This field is required.
- Table: The table name. Type is a string. This field is required.
- MappingName: The mapping JSON file. Type is a string. This field is required.
- FilterName: The filter name, if any. Type is a string. This field is required.
- CIName: The CIName, if any. Type is a string. This field is required.
The Data Hydration Configuration file is validated against the following schema:
{
  "type": "object",
  "properties": {
    "ImportFields": {
      "type": "array",
      "uniqueItems": true,
      "items": {
        "type": "object",
        "properties": {
          "Name": {
            "type": "string"
          },
          "DisplayName": {
            "type": "string"
          },
          "FileTypes": {
            "type": "array",
            "minItems": 1,
            "uniqueItems": true,
            "items": {
              "type": "string",
              "enum": [
                ".xlsx",
                ".xls",
                ".csv"
              ]
            }
          },
          "Description": {
            "type": "string"
          },
          "WorksheetMappings": {
            "type": "array",
            "minItems": 1,
            "uniqueItems": true,
            "items": {
              "type": "object",
              "properties": {
                "DestSheetName": {
                  "type": "string"
                },
                "SourceSheetName": {
                  "type": "string"
                }
              },
              "required": [
                "DestSheetName"
              ],
              "additionalProperties": false
            }
          },
          "DataMappings": {
            "type": "array",
            "minItems": 1,
            "uniqueItems": true,
            "items": {
              "type": "object",
              "properties": {
                "Table": {
                  "type": "string"
                },
                "MappingName": {
                  "type": "string"
                },
                "FilterName": {
                  "type": "string"
                },
                "CIName": {
                  "type": "string"
                }
              },
              "required": [
                "Table",
                "MappingName",
                "FilterName",
                "CIName"
              ],
              "additionalProperties": false
            }
          }
        },
        "required": [
          "Name",
          "DisplayName",
          "FileTypes",
          "Description",
          "WorksheetMappings",
          "DataMappings"
        ],
        "additionalProperties": false
      }
    }
  },
  "required": [
    "ImportFields"
  ],
  "additionalProperties": false
}
The DataHydrationConfigSchema.json file is used to validate the DataHydrationConfig.json file. Config validation takes place upon navigating to the Data Hydration page. The DataHydrationConfigSchema.json file can be found at the following relative path for the RDT executable: "..\resources\bin\Config\Schemas\DataHydrationConfigSchema.json".
Users sees a red error box in the top right-hand corner on the RDT window if validation fails, as seen in the following figure:
Figure 10: Example showing a failed validation error message.
