How to Enable and Disable CDN Communication
Last updated on 4 August, 2021.
Document Status: Document Feature Complete as of August 4, 2021; PENDING EXTERNAL REVIEW.
Overview
In order for content to replicate from one target node to another, the CDN communication protocol must be enabled on the node. There are two different protocols used within RPS: DFSR and BITS. Each is dependent on whether the content is being replicated to a target outside of the local domain or to a target within the local domain. Both DFSR and BITS can be enabled and disabled using PowerShell and the RPS UI.
Prerequisites
Users enabling or disabling CDN communication should be assigned CDN Sync or RPS Admin permissions.
DFSR
DFSR is the Distributed File System Replication windows service, and runs on RPS servers. This is a multi-master replication engine which allows synchronization of folders between servers. DFSR is used when content is being replicated to a target node within the local domain. This protocol is faster than BITS and should be used whenever feasible.
Warning
DFSR cannot be used to send content to a target outside the local domain.
BITS
BITS is the Background Intelligent Transfer Service, a windows service which facilitates asynchronous, prioritized, and throttled transfer of files between machines using idle network bandwidth. BITS is used when content is being sent to a target node outside of the local domain. While this protocol is also capable of sending content within the local domain, it is much slower than DFSR and therefore should not be enabled for local domain replication.
Tip
BITS should only be used to replicate content outside of the local domain.
Enable/Disable CDN Using PowerShell
In PowerShell, the cmdlet Enable-RpsCdn is used in conjunction with $true to enable, or $false to disable,
the CDN communication protocols, as shown in the following examples:
Enable DFSR
Enable-RpsCdn -Dfsr $true
Disable DFSR
Enable-RpsCdn -Dfsr $false
Enable BITS
Enable-RpsCdn -Bits $true
Disable BITS
Enable-RpsCdn -Bits $false
Enable DFSR and BITS
Enable-RpsCdn -Dfsr $true -Bits $true
Disable DFSR and BITS
Enable-RpsCdn -Dfsr $false -Bits $false
Enable DFSR and Disable BITS
Enable-RpsCdn -Dfsr $true -Bits $false
Disable DFSR and Enable BITS
Enable-RpsCdn -Dfsr $false -Bits $true
Enable/Disable CDN Using the RPS UI
DFSR and BITS may also be enabled or disabled using the RPS UI. To accomplish this, follow the 4-step process below:
Access the RPS UI website using the following URL convention: https://<server hosting Rps UI>:8080
If the browser does not immediately open to the local node, users can access it by selecting "Targeting" from the menu ribbon and clicking Nodes, as shown in the following figure:
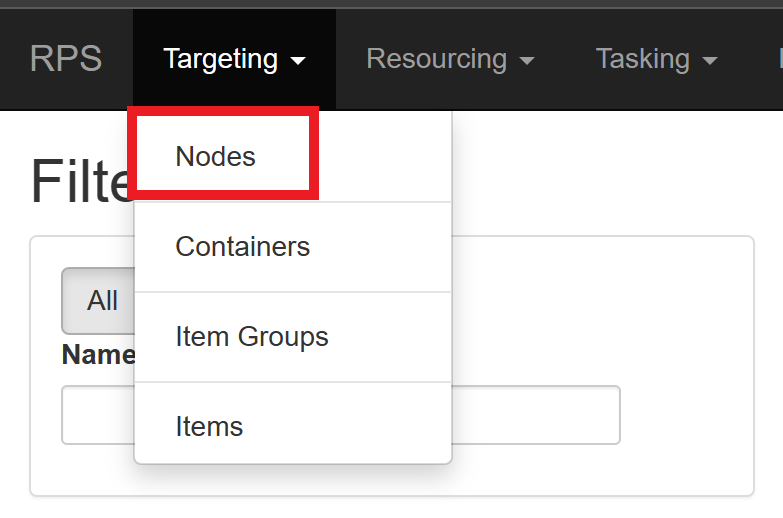
Figure 1: Navigate to the local node.
From this screen, users can then select the desired node by clicking the name of the node from the list. Shown as "Default" in the following figure:
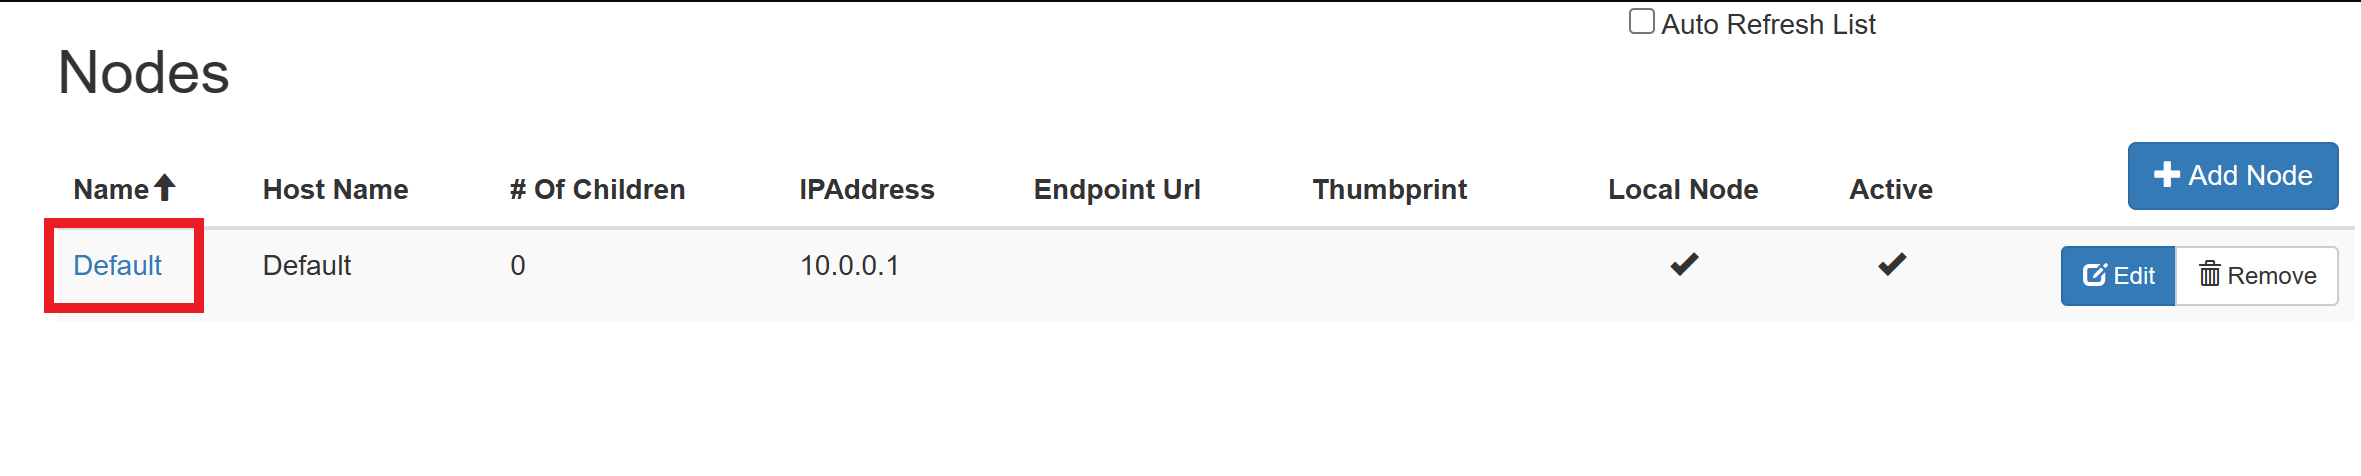
Figure 2: Select the desired node.
Under the "Data Replication" section, click Edit and a "Data Replication Settings" box will appear.
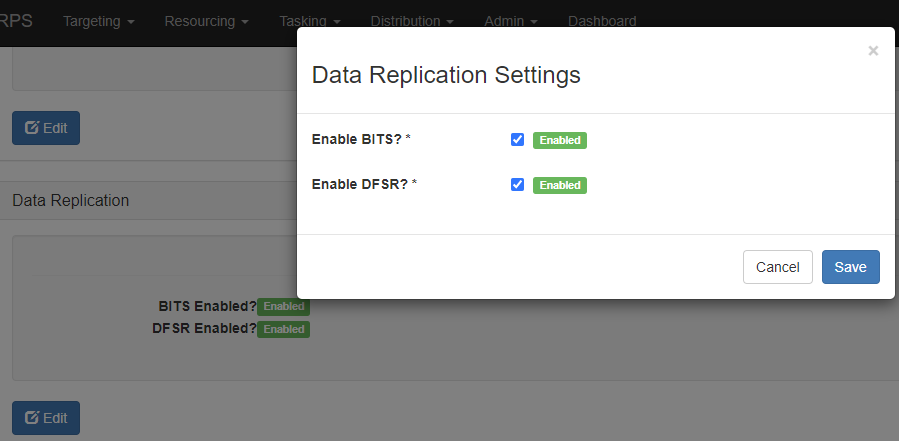
Figure 3: Data Replication Settings box.
Check to Enable or UnCheck to Disable the appropriate CDN Communication protocol, then click Save to apply your settings, as shown in the following figure:
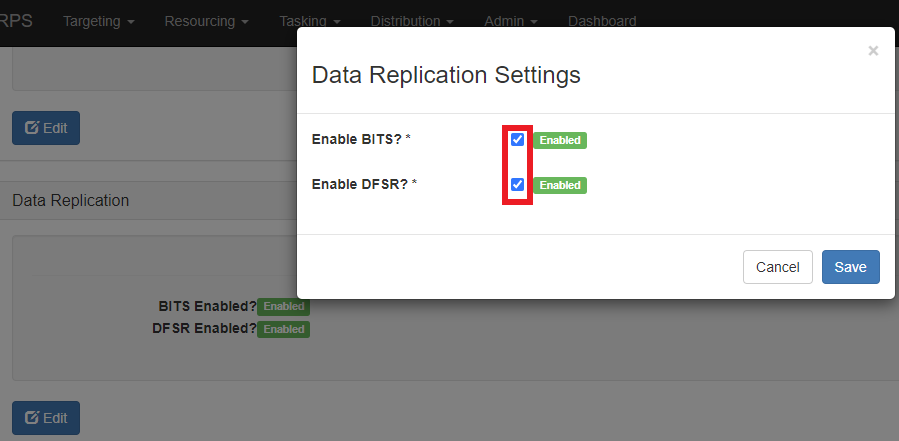
Figure 4: Enable/Disable CDN from RPS UI.